Several people have asked this and I thought I would put together something a bit more comprehensive than "use macro mode". If anyone has anything else to add or information below to edit, please feel free to weigh in.
CAVEAT: This how-to is geared towards people using point and shoot cameras, if you are using an SLR or a DSLR, you can overcome many of the shortcomings of a point and shoot by manually adjusting the settings.
Diamonds are very challenging to take photos of - especially appealing photos. This is even more of an issue when you use a point and shoot camera with autofocus.
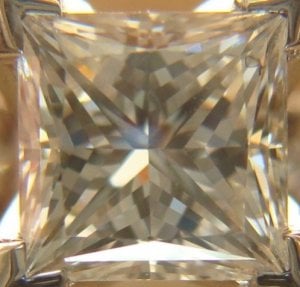
When you use a point and shoot autofocus camera in macro or "flower mode" (close focus), it has a very narrow depth of view (plane of focus). In macro mode, the camera has a very shallow depth of view. A bit of photography 101 here - The depth of view is the plane perpendicular to the camera that is in focus on the resulting image. This can range from very wide (landscape mode) to very narrow (using macro or high zoom). The depth of view is dictated on the ability of the camera to gather light. Wider in bright outdoor areas, and very shallow when you''re up close to something or at night time. So, depending on how the camera interprets the incoming light, the shallow plane of the diamond that is the most appealing, may not be the one that ends up in focus. Think of this as a very thin slice of your diamond that the camera can focus on. This is because what you see (the light reflected off the pavilion of the diamond is then projected and refracted (scattered) off the surface as it leaves the stone (giving you fire), so ideally, the camera would focus on the external table of the diamond (what your eye sees which is a projected image of the pavilion, as opposed to the pavilion itself), but most of the time it actually focuses on the pavilion since the table is essentially a window into the diamond when looking at it from straight on.
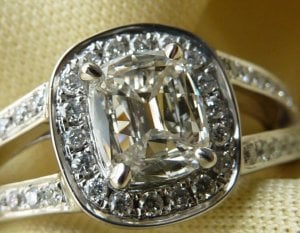
So how do you take a good photo? I would suggest using a tripod. If you don''t have one, get one. One of those small, flexible leg, or table-top tripods are very inexpensive (about $10) and are very versatile. You want to use a tripod because when you get very close to a diamond with the lens of the camera, you are, in effect, blocking most of the light entering the stone and thus the light reflecting back out. So in order for the image to be properly exposed (not to light or to dark), the camera will alter the speed of the shutter in order for the camera to collect enough light to properly exposed the image. When you hold the camera with your hand, it is very difficult to take a sharp image in these conditions. When the shutter is open for longer, the camera is susceptible to your hand shaking and you will likely get a blurry image.
Taking the photo with a dark background will make this worse because the darker the background, the less light there is for the camera to collect and make your image. Using a light colored or semi-reflective background will help you take a sharper image. Be careful though, make sure the camera is focused on the diamond, because the camera will adjust to properly expose the subject (diamond), and not the background. If you don''t do this, the subject will appear very dark compared to the background. The inverse goes for dark backgrounds (the stone will appear light compared to the dark background).
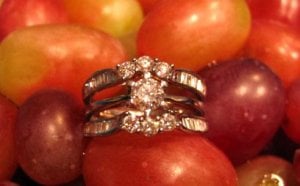
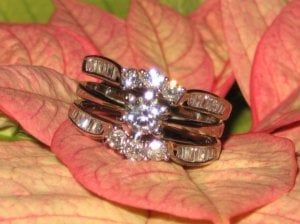
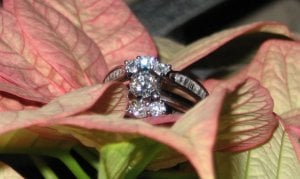
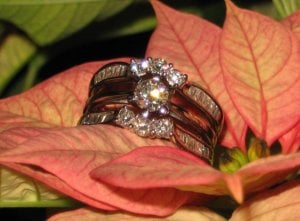
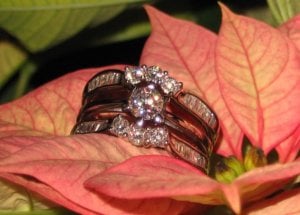
Flower shots are an ideal way to have a light, colorful and interesting background to a diamond you are photographing. It seems like these are favorites not only because they combine interesting components, but because they are often times they result in the clearest, most detailed images.
Tips:
1) Try to have a background close behind your subject. Otherwise this tends to confuse the autofocus, especially if your subject is small in the frame. If you are trying to hold up your diamond and take a photo of it without a background immediately behind the stone, the camera will be confused and try to focus on whatever is behind the diamond.
2) The lighter the better. Trying to take photos in a dark room will surely get you blurry images. The flash usually doesn''t help as it will just reflect back off of the table and it will look opaque and white in the photo
3) Try to have the camera as close to your subject as possible using the least zoom possible (zooming in marco mode really confuses most cameras and usually doesn''t get you anything other than a smaller, albeit brighter, image of your subject). This will get you the widest depth of view that your camera can have while still in macro mode. Zooming in results in a shallower depth of view (plane of focus) to work with - see above.
4) I am going to contradict myself a little bit here. Having the camera close to the subject is going to result in the most detailed image of your subject, but having the camera and lens that close is also going to block most of the light entering the diamond and may result in a somewhat lifeless photo. Keeping the camera farther away from the diamond will allow more light to enter the stone and will give you a lighter image and you are more likely to get those fire shots (especially if you are not looking straight into the table of the stone). Try playing around with this, your camera will probably have it''s own happy medium between being close enough to the stone to get a large image and being far enough (using zoom) to focus and to get a nice bright image.
5) Having a light source from behind the stone is nice because the light is entering the pavilion and not the table, so you can get closer to the diamond without blocking the light entering the stone with the camera. You may want to use diffuse light though instead of direct sunlight so you don''t have a back-lighting effect (light background with a dark subject). Diffuse lighting on a cloudy day works well, otherwise a thin white curtain or a piece of printer paper taped to a window works well too. This also satisfies having a background behind your subject.
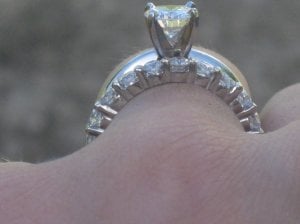
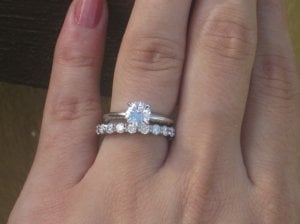
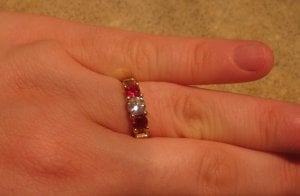
6) Keep both the camera and ring as stationary as possible. Handshots are nice, but due to the hand shaking issue (see above), it is hard to get a large, clear image of your diamond when it is on your hand, especially if you are taking the picture using your non-dominant hand. Having the ring resting on a stationary surface and using a tripod works well.
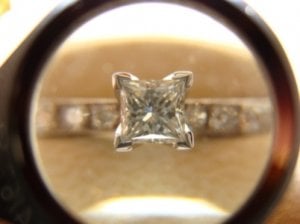
7) Using magnification. A microscope or a magnifying glass works well for getting a large image, but may distort the real-life look of the stone (magnifying glasses tend to give a fish-eyed image - not the same as the dreaded fish-eye under the table).
 Have fun and experiment.
CAVEAT: This how-to is geared towards people using point and shoot cameras, if you are using an SLR or a DSLR, you can overcome many of the shortcomings of a point and shoot by manually adjusting the settings.
Diamonds are very challenging to take photos of - especially appealing photos. This is even more of an issue when you use a point and shoot camera with autofocus.
When you use a point and shoot autofocus camera in macro or "flower mode" (close focus), it has a very narrow depth of view (plane of focus). In macro mode, the camera has a very shallow depth of view. A bit of photography 101 here - The depth of view is the plane perpendicular to the camera that is in focus on the resulting image. This can range from very wide (landscape mode) to very narrow (using macro or high zoom). The depth of view is dictated on the ability of the camera to gather light. Wider in bright outdoor areas, and very shallow when you''re up close to something or at night time. So, depending on how the camera interprets the incoming light, the shallow plane of the diamond that is the most appealing, may not be the one that ends up in focus. Think of this as a very thin slice of your diamond that the camera can focus on. This is because what you see (the light reflected off the pavilion of the diamond is then projected and refracted (scattered) off the surface as it leaves the stone (giving you fire), so ideally, the camera would focus on the external table of the diamond (what your eye sees which is a projected image of the pavilion, as opposed to the pavilion itself), but most of the time it actually focuses on the pavilion since the table is essentially a window into the diamond when looking at it from straight on.
So how do you take a good photo? I would suggest using a tripod. If you don''t have one, get one. One of those small, flexible leg, or table-top tripods are very inexpensive (about $10) and are very versatile. You want to use a tripod because when you get very close to a diamond with the lens of the camera, you are, in effect, blocking most of the light entering the stone and thus the light reflecting back out. So in order for the image to be properly exposed (not to light or to dark), the camera will alter the speed of the shutter in order for the camera to collect enough light to properly exposed the image. When you hold the camera with your hand, it is very difficult to take a sharp image in these conditions. When the shutter is open for longer, the camera is susceptible to your hand shaking and you will likely get a blurry image.
Taking the photo with a dark background will make this worse because the darker the background, the less light there is for the camera to collect and make your image. Using a light colored or semi-reflective background will help you take a sharper image. Be careful though, make sure the camera is focused on the diamond, because the camera will adjust to properly expose the subject (diamond), and not the background. If you don''t do this, the subject will appear very dark compared to the background. The inverse goes for dark backgrounds (the stone will appear light compared to the dark background).
Flower shots are an ideal way to have a light, colorful and interesting background to a diamond you are photographing. It seems like these are favorites not only because they combine interesting components, but because they are often times they result in the clearest, most detailed images.
Tips:
1) Try to have a background close behind your subject. Otherwise this tends to confuse the autofocus, especially if your subject is small in the frame. If you are trying to hold up your diamond and take a photo of it without a background immediately behind the stone, the camera will be confused and try to focus on whatever is behind the diamond.
2) The lighter the better. Trying to take photos in a dark room will surely get you blurry images. The flash usually doesn''t help as it will just reflect back off of the table and it will look opaque and white in the photo
3) Try to have the camera as close to your subject as possible using the least zoom possible (zooming in marco mode really confuses most cameras and usually doesn''t get you anything other than a smaller, albeit brighter, image of your subject). This will get you the widest depth of view that your camera can have while still in macro mode. Zooming in results in a shallower depth of view (plane of focus) to work with - see above.
4) I am going to contradict myself a little bit here. Having the camera close to the subject is going to result in the most detailed image of your subject, but having the camera and lens that close is also going to block most of the light entering the diamond and may result in a somewhat lifeless photo. Keeping the camera farther away from the diamond will allow more light to enter the stone and will give you a lighter image and you are more likely to get those fire shots (especially if you are not looking straight into the table of the stone). Try playing around with this, your camera will probably have it''s own happy medium between being close enough to the stone to get a large image and being far enough (using zoom) to focus and to get a nice bright image.
5) Having a light source from behind the stone is nice because the light is entering the pavilion and not the table, so you can get closer to the diamond without blocking the light entering the stone with the camera. You may want to use diffuse light though instead of direct sunlight so you don''t have a back-lighting effect (light background with a dark subject). Diffuse lighting on a cloudy day works well, otherwise a thin white curtain or a piece of printer paper taped to a window works well too. This also satisfies having a background behind your subject.
6) Keep both the camera and ring as stationary as possible. Handshots are nice, but due to the hand shaking issue (see above), it is hard to get a large, clear image of your diamond when it is on your hand, especially if you are taking the picture using your non-dominant hand. Having the ring resting on a stationary surface and using a tripod works well.
7) Using magnification. A microscope or a magnifying glass works well for getting a large image, but may distort the real-life look of the stone (magnifying glasses tend to give a fish-eyed image - not the same as the dreaded fish-eye under the table).






300x240.png)