
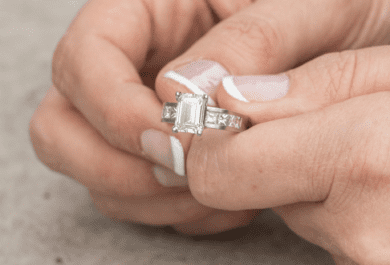
How Are Diamonds Made? Natural vs Lab-Created Explained
Two Paths, One Diamond Not all diamonds come from the same place — but they all start the same way. Pure carbon, crystalized under immense pressure and heat. Whether it…
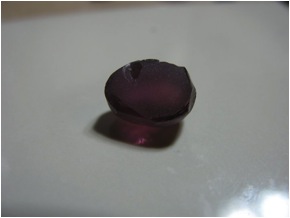
I am often asked by clients, friends and family about how gemstones are faceted. I designed this photo pictorial to illustrate to the steps of the gemstone cutting process. The gemstone I selected for this first pictorial was a 13.3ct piece of rhodolite garnet from Africa. Due to the shape of the rough, I chose an oval design for the finished gemstone. The pictures below show the gem progress from a piece of rough to a finished gemstone. Each photograph is described in depth to highlight what is occurring during the gemstone cutting process.
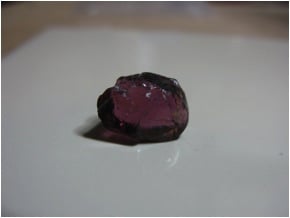
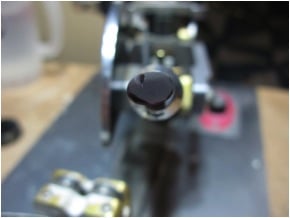
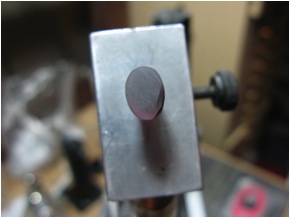
This is the front view of the piece of rhodolite rough. Note the shape of the gemstone is almost preformed into an oval shape.

This is the backside of the piece of rough. The first step in the gemstone cutting process will be to preform the rough rhodolite into a shape before it is faceted.
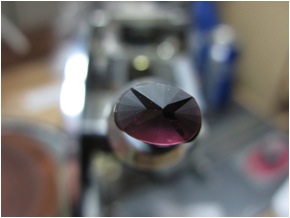
This picture highlights an inclusion that is the yellowish spot in the middle of the gemstone. This inclusion will be ground out during the preforming process.
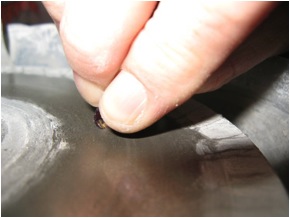
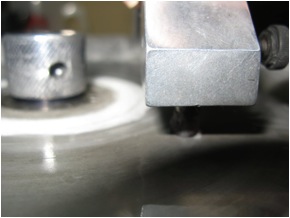
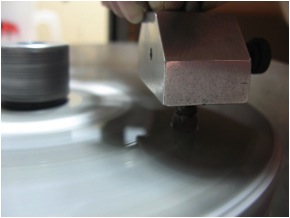
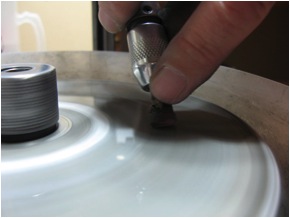
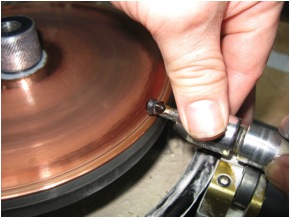
This picture highlights the preforming process. Here I am grinding a basic shape into the stone on a 260 grit diamond cutting lap on high speed. Water is placed on the lap to make the cutting process more efficient and cool the gemstone.
Another photo demonstrating preforming.
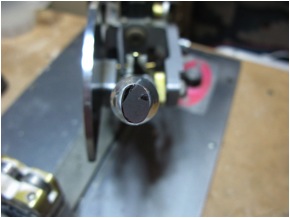
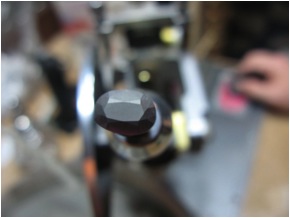
This is the preformed shape of the gemstone. Notice that the shape is not perfect and there is a large dip in the area of the gemstone that will be the table. These two features will be taken care of during the next step of cutting.
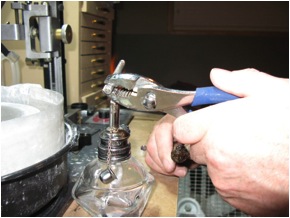
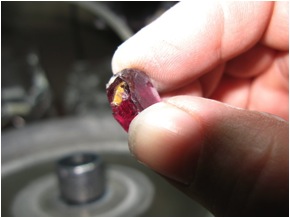
Here I am heating my dop stick and wax in order to dop the gemstone to enable cutting.
The gemstone must be heating up in order to create a good bond between the wax, dop stick, and the gemstone. The faceter must be careful not to hold the stone in one place for too long or it may cause the stone to crack or cause other damage.

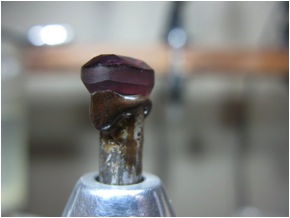
The garnet adhered to the dop stick with wax.
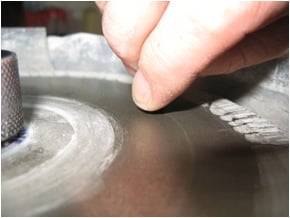
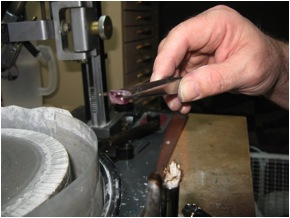
Here I am finishing up the shaping process to create a uniform, pleasant shape for the garnet. I have changed my lap from a 260 grit to a 600 grit lap. This will allow a slower cutting process where I will have more control over the speed of cutting.
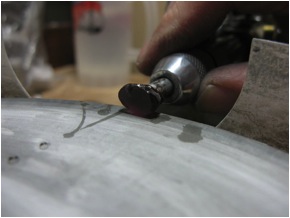
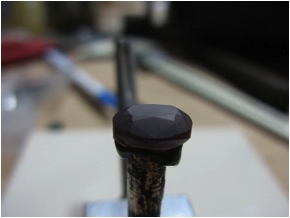
This view shows the finished outline of the gemstone, it may not look uniform in this picture, however the shape is good!
Another view of the finished outline.
After finishing the outline, I place a 45 degree adapter dop on my MDR faceting machine. This dop is used to cut a 90 degree table. The cutter places his dop with the garnet in the 45 degree adapter dop, places the angle to 45 degrees and this combination creates a flat table.
Another view of the table being cut.
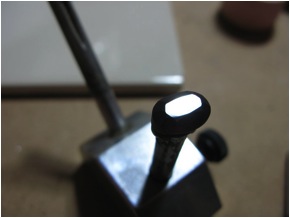
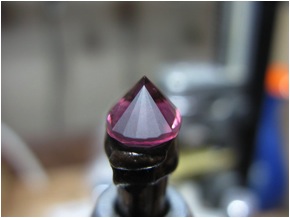
This is a finished picture of the table after it has been cut in, notice that there is a non flat portion in the bottom right hand side of the stone. This part of the stone will be cut out when the main crown facets are faceted.
The next step of the cutting process is to cut in the main crown facets. The 45 degree adaptor dop is removed; the dop with the garnet is placed back into the machine and tightened down. The angle is then changed to the angle of the main crown facets. For the ends on the oval, the angle must be adapted in order to establish a level girdle.
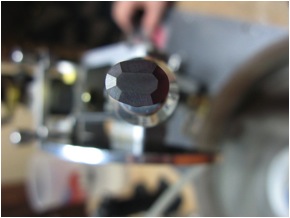
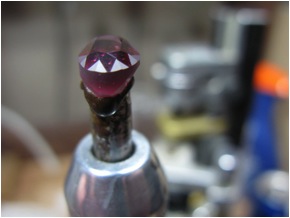
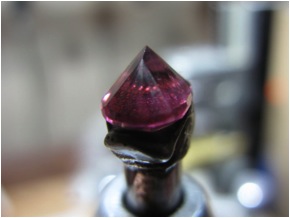
This photo shows the eight main crown facets after they have been cut.
This Photo was taken after the star facets were added to the garnet.
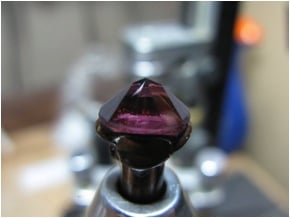
This photo highlights all the crown facets after they have been cut into the rough gemstone.
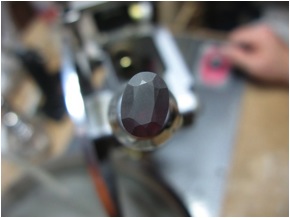
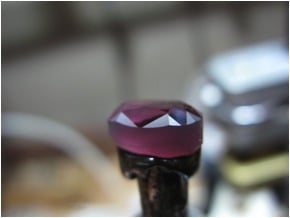
This is a side view of the garnet before polishing. Notice that the facets are not perfectly meeting each other. This will be corrected during the polishing phase for the crown. By not cutting the facets in all the way a cutter has more room for polishing and often times can product perfect meets.
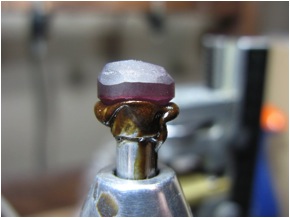
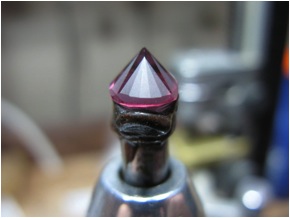
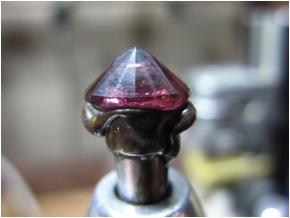
This photo shows the polished table of the garnet. The 45 degree adapter dop is once again affixed to the dop, instead of using a 600 grit diamond lap, the lap is changed to a copper lap with 50K diamond powder. Polishing laps come in a variety of kinds such as copper or ceramic, and every faceter has his opinion on which laps should be used when. For me, I rarely use anything besides a copper lap or a BATT lap with 50k diamond powder.
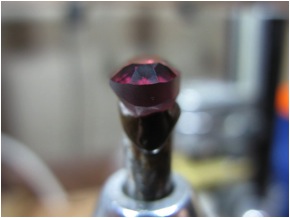
After polishing the table, the next step is to polish the main crown facets. This photo is showing the main crown facets after they have been polished on the copper lap with 50k diamond powder.

Another view of the crown showing the side crown facets after polishing.
The next photo is of the star facets after they have been polished and are not perfectly meeting the main facets.
Another view of the star facets after they have been polished.
The girdle facets are the last set to be polished before the girdle is polished and the pavilion cut. This photo shows the crown facets after all three tiers have been polished.
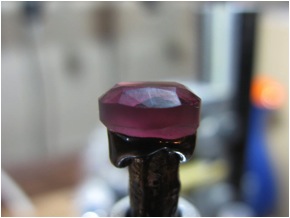
The side view showing the polished facets.
The girdle is the last polishing step on the crown. The polishing agent is slightly different; instead of a powder, a paste of 8k diamond powder is used. I could have polished the girdle after the basic outline was cut, however, by waiting till this stage, the polishing of the girdle takes considerably less time to polish.
This shot shows the polished girdle. Not all of the stone has to be polished because much of the material will be cut away when the pavilion is cut.
This view shows the pavilion of the gemstone after the stone has been transferred from one dop stick to another. Notice the polished area of the gemstone compared to the unpolished area.
For the pavilion, I only took one picture of the cutting process. I got excited and wanted to get this stone finished!
This view shows the top down view of four of the facets after polishing on the copper lap with 50k diamond polish.

A side view of the same facets after polishing.
After two more sets of pavilion facets have been polished. The stone is very close to being done.
The tips of the oval prior to being polished, you can notice the area in the middle of the oval to the right and left of these facets. This area will be polished next.
The white area in the middle of the gemstone is actually a reflection of light off of the now polished middle facets.
A different view showing the middle facets being completely polished, only 8 more facets before the stone is finished!
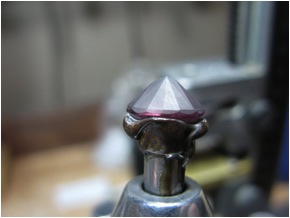
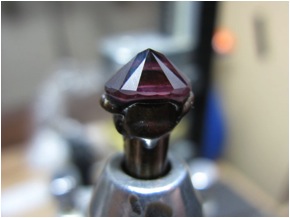
The finished pavilion with all facets meeting perfectly.
Middle of the pavilion showing the polished facets.
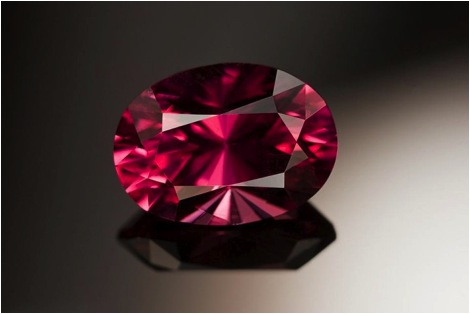
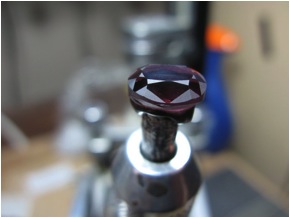
This picture shows the finished 4.98 carat finished garnet. The finished carat weight establishes a yield of 37.44% from the rough gemstone weight of 13.30 carats.
by Jim Rentfrow
Flawless Facets
![]()
Click here to discuss on the Forum

Retail Diamond Prices Chart Updated Monthly.
Two Paths, One Diamond Not all diamonds come from the same place — but they all start the same way. Pure carbon, crystalized under immense pressure and heat. Whether it…

A Wedding Ring as Unique as Your Love Finding the right wedding ring isn’t just about diamonds or gold – it’s about finding the one that feels right. With hundreds…
So, you’re thinking about lab-grown diamonds? Smart move. They’re just as sparkly as the natural kind but usually cost less. But where do you actually go to buy them? It…
 is an easy tool that analyzes the data of round diamonds and calculates a score that grades cut quality.")