asymons412
Shiny_Rock
- Joined
- Mar 25, 2011
- Messages
- 247
So, a few weeks ago, I ordered bridesmaid cards from a seller on Etsy and fell in love with how professional and lovely they came out. After looking up and visiting a local scrapbooking store, I quickly realized how easy and cheap it is to make your own papergoods and decided to give it a shot for my save-the dates!
My biggest issue with premade ones on vistaprint, etc, was that they tend to appear very casual (which of course is the idea for some couples!) or require an image of the couple, which we won't have for a while due to the fact that we live across the country from whoever our engagement/wedding photographer will be...
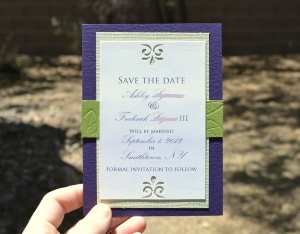
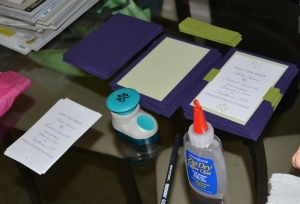
Here's my shot at a save-the-date for our classy vineyard-themed purple-and-green wedding!
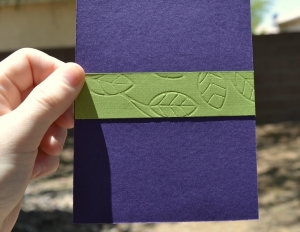
The next images (front and back) show the textures of the cardstocks really well! (excuse the weird contrasty color and paper lifting-- these were just tacked on as a sample)
My question is-- do these appear too formal/not fun enough? We're a pretty fun couple, but I really want the feel of the wedding to be classic and elegant. Even better, if I choose to do my invitations, I can model them after these-- they'd likely be pocket or booklet invitations.
I also plan on ordering custom stamps with our picture and "we're getting married!" on them in order to add to the fun element!
Thoughts?
My biggest issue with premade ones on vistaprint, etc, was that they tend to appear very casual (which of course is the idea for some couples!) or require an image of the couple, which we won't have for a while due to the fact that we live across the country from whoever our engagement/wedding photographer will be...
Here's my shot at a save-the-date for our classy vineyard-themed purple-and-green wedding!

The next images (front and back) show the textures of the cardstocks really well! (excuse the weird contrasty color and paper lifting-- these were just tacked on as a sample)


My question is-- do these appear too formal/not fun enough? We're a pretty fun couple, but I really want the feel of the wedding to be classic and elegant. Even better, if I choose to do my invitations, I can model them after these-- they'd likely be pocket or booklet invitations.
I also plan on ordering custom stamps with our picture and "we're getting married!" on them in order to add to the fun element!
Thoughts?



300x240.png)