shape
carat
color
clarity

Calling crafty people!

MeowMeow

Brilliant_Rock
Joined
Nov 27, 2009
Messages
1,646
I hope this section is okay for this... It's not shopping persay so I wasn't sure if it belonged in there it not.

But here goes. I have a small dilemma! I am working on creating my own marbled vanity stand tray. I opened the box of tile and noticed both peices had chips around the edges. I think Home Depot even sent me the wrong tile entirely as well but I kept it because I had already waited 2 weeks already and this was closer to matching the patterning on our fireplace anyway.

So does anyone happen to have any ideas on how I could either 1) get rid of the chips entirely without having to cut the tile or 2) hiding the chips instead? I was considering trying to see if I could get some sort of metal border but I would rather not have to add anything if I don't have to. I think it would look better without it.
 

Tartansparkles

Brilliant_Rock
Joined
Feb 23, 2017
Messages
929
My first thought was to hide the chips possibly with grout - but I was thinking you were tiling with the tiles and on re-reading, I've misunderstood. What's a vanity stand tray? And of course, you can't call crafy folks and not provide pictures =)2
 

MeowMeow

Brilliant_Rock
Joined
Nov 27, 2009
Messages
1,646
My first thought was to hide the chips possibly with grout - but I was thinking you were tiling with the tiles and on re-reading, I've misunderstood. What's a vanity stand tray? And of course, you can't call crafy folks and not provide pictures =)2

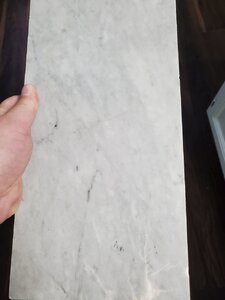
Haha OK so this is my tile piece. I have little feet underneath not shown.
Most DIY's of this nature have little handles on top. It's the same as a perfume tray. Am I allowed to post some pictures of other trays here?

For mine I just went with feet so it stands up instead of having handles. But anyway you can see all the little flea bite chips there on the sides i don't know how to hide or fix. There may even be a crack in the bottom but i am overlooking that because I don't plan on putting wet or heavy items on top of it anyway. Not sure if maybe my husband could hack off a couple inches off the long end at some point?

20200924_142320.jpg
 

Tartansparkles

Brilliant_Rock
Joined
Feb 23, 2017
Messages
929
Could you maybe 'sand' the chips with something like a dremmel? And then convince yourself that since the marble came from the earth, these are part of its natural flaws? I have hand cut mosaic tiles (I think they are limestone) and they are very chipped - but smooth chips, if that makes sense, around the edges.
 

MamaBee

Super_Ideal_Rock
Joined
Mar 31, 2018
Messages
14,498
Haha OK so this is my tile piece. I have little feet underneath not shown.
Most DIY's of this nature have little handles on top. It's the same as a perfume tray. Am I allowed to post some pictures of other trays here?

For mine I just went with feet so it stands up instead of having handles. But anyway you can see all the little flea bite chips there on the sides i don't know how to hide or fix. There may even be a crack in the bottom but i am overlooking that because I don't plan on putting wet or heavy items on top of it anyway. Not sure if maybe my husband could hack off a couple inches off the long end at some point?

20200924_142320.jpg
I can’t tell if it’s a honed or glass finish. If it’s a honed finish you can take a new emery board and lightly sand it to smooth it out so it doesn’t feel rough..You can also use very fine sandpaper making sure you keep it only on the chip.
 

MeowMeow

Brilliant_Rock
Joined
Nov 27, 2009
Messages
1,646
Could you maybe 'sand' the chips with something like a dremmel? And then convince yourself that since the marble came from the earth, these are part of its natural flaws? I have hand cut mosaic tiles (I think they are limestone) and they are very chipped - but smooth chips, if that makes sense, around the edges.

Hmm I can ask my husband when he comes home! That might be a possibility! If it was smoother I think I could be less cranky about it for sure!

I can’t tell if it’s a honed or glass finish. If it’s a honed finish you can take a new emery board and lightly sand it to smooth it out so it doesn’t feel rough..You can also use very fine sandpaper making sure you keep it only on the chip.

I am pretty sure it's polished :( it's not the specific tile I ordered so it's hard to tell. It looks shiney compared to my soap dish though. That looks more brushed in texture. I wonder if taking an emery board to the sides would still be a good idea since those are the parts that bother me?
 

MeowMeow

Brilliant_Rock
Joined
Nov 27, 2009
Messages
1,646
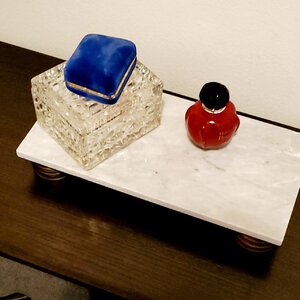
So I thought I would do a quick update with how I ended up doing my tray. I may still go back and try to round out the ends so its more oval-shaped but for now I'm leaving it be. Please pardon my yellow incandescent closet lighting. I only have my glass trinket box, one perfume bottle and one old ring box out. But I thought it turned out decent enough.

20201125_143833-01.jpeg
 

MeowMeow

Brilliant_Rock
Joined
Nov 27, 2009
Messages
1,646
Looks good :). What did you decide to do about the chips ? (Certainly can't see them from here!)

Thank you! They were along the edges mostly so I ended up taking some sand paper to the sides to kind of at least make them smooth to the touch even if it's not shiney like the top. So they aren't really there much anymore xD I still need to eventually get some really fine sandpaper and take it to the tile but for now it's good enough :D I still want to make another of these sometime soon. Hopefully in the correct colour instead of whatever it is Home Depot decided to send me this attempt.
 

Tartansparkles

Brilliant_Rock
Joined
Feb 23, 2017
Messages
929
There's a lovely satisfaction when a project comes together, well done.
 

Cozystitches

Brilliant_Rock
Premium
Joined
Mar 2, 2010
Messages
1,229
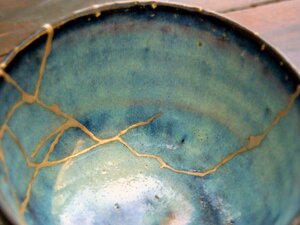
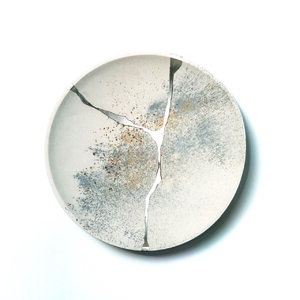
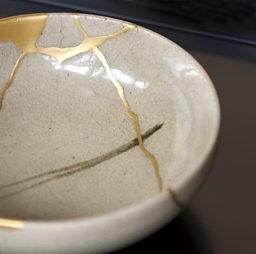
I'm sure you're all finished with your project, but one thing came to mind. Unfortunately I have NO IDEA the name...but essentially you fill a crack/blemish with gold and then seal after. I seem to recall this was done on like Japanese vases, but when I looked up Japanning...it didn't seem to bee the same.
 

Cozystitches

Brilliant_Rock
Premium
Joined
Mar 2, 2010
Messages
1,229
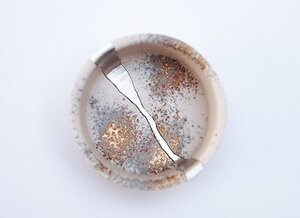
Ok, Google is awesome. Apparently it's called: " Kintsugi" :) It looks neat (beyond my capabilities)....
 

MeowMeow

Brilliant_Rock
Joined
Nov 27, 2009
Messages
1,646
I'm sure you're all finished with your project, but one thing came to mind. Unfortunately I have NO IDEA the name...but essentially you fill a crack/blemish with gold and then seal after. I seem to recall this was done on like Japanese vases, but when I looked up Japanning...it didn't seem to bee the same.

Haha when I was frantically trying to figure out what to do I saw this and definitely thought about it! Just wasn't sure if I could do it either lol. I thought about filling it with resin too like my FIL did the hole in the wood for the jewellery box he and my husband made me. But I don't know how to so that either so I skipped it xD maybe in the future!
 

Tartansparkles

Brilliant_Rock
Joined
Feb 23, 2017
Messages
929
I learned about the gold filling technique in my pottery class, the teacher explained it as celebrating the perfection of imperfection as in the broken vase is now perfectly imperfect. It took a while to get my head around that one!
 

Daisys and Diamonds

Super_Ideal_Rock
Joined
Apr 30, 2019
Messages
22,697
I'm sure you're all finished with your project, but one thing came to mind. Unfortunately I have NO IDEA the name...but essentially you fill a crack/blemish with gold and then seal after. I seem to recall this was done on like Japanese vases, but when I looked up Japanning...it didn't seem to bee the same.

ive looked into that before
you can buy kits
also silver ones (cheaper to practice on)
it looks really beautiful
ive thought about doing it
even just to beautify up a chip

but i think its an art form to get it to look beautiful
but something to keep in mind for highly sentimental accidents kintsugi-cover.jpg 8be5fdb2785f51c9a7d9057daee76f5f.jpg 25f2f8c680d1ab26cc9282d85f58a791.jpg
p037kb0l.jpg
 
Be a part of the community Get 3 HCA Results
Top