shape
carat
color
clarity

How to Post Photos from a Mac

Status
Not open for further replies. Please create a new topic or request for this thread to be opened.

kenny

Super_Ideal_Rock
Premium
Joined
Apr 30, 2005
Messages
34,319
As recommended I've written a procedure for people with Mac computers and iPhoto, which comes free on every Mac.
I'm posting it here so you can proofread it for clarity or other suggestions and try it out if you have a Mac.
Suggestions are welcome.

It only looks long because I've written out in every single step for clarity, and so it can be used by people with all levels of familiarity.
After you do it a few times it takes no time at all.

Admin says after it is ready it can be added to the FAQs.

Thanks.
 
I'm using version 7.1.5 of iPhoto, and 10.5.8 Mac operating system.
(Buttons to click on are in caps, I'm not yelling at you)

1. With camera turned off and iPhoto NOT open connect the USB cable from computer to camera.

2. Turn on Camera, this will automatically launch iPhoto and prepare pics on camera for loading into the computer.

3. If you want to load all of the pics click on IMPORT ALL. If you want to only load certain ones select them and click on IMPORT SELECTED.

4. After the pics are imported a window will pop up asking if you want to delete the pics from the camera or leave them there. Select one.

5. Thumbnails of the pics will appear in a window of iPhoto.

6. Click on a thumbnail to open a pic. It will open in a new large window.

7. You can usually improve a pic so in the bottom left corner click on EDIT.

8. Eight tool Icons appear on the lower left, ROTATE, CROP, STRAIGHTEN, ENHANCE, RED-EYE, RETOUCH, EFFECTS and ADJUST. I encourage you to try out all of these. Don't be afraid; anything you do can be undone by clicking on the word EDIT in the menu bar at the top of the screen and selecting UNDO.

9. I recommend copping to see only what is most important in the pic, usually tighter is better.

10. Click on Enhance; if you like how the new exposure looks you may be done and ready to skip to step 13 to export the pic.

11. If you didn't like what the ENHANCE button did click on EDIT then UNDO.

12. Setting the exposure and fixing the color balance is the most complicated step but can make a huge improvement.
Click on ADJUST.
This brings up a little window with 9 adjustments you should experiment with.
For almost all pics I recommend adjusting EXPOSURE to move the brightest white area in the pic up to be as bright as the white in the background, but push it no further than that.
Next adjust CONTRAST so the darkest area is pushed down to be as dark as possible, but pushed down no further.
Next if there is muddiness in the shadows move the SHADOWS tool.
If there is washed out bright sections move the HIGHLIGHTS tool.
If the pic has a yellow or bluish cast mess with those two color sliders.
Notice though with these 9 settings that the pic may start to look weird if you deviate TOO far from the original.

Note (IMHO you should post the clearest largest pic you can, this translates to the highest resolution and size that fit in Pricescope's 100 KB limit and is no larger than about 9 inches across)

13. When you are finished with the pic and ready to export it look on the menu bar at the top of the screen, and click on FILE then EXPORT...

14. A window pops up. Under Kind select JPEG.

15. Quality: Medium. Size: Custom 900 px (you may want to experiment with different numbers here, for me 900 is the largest that worked on PS)

16. Another window pops up that lets you name the file and tell it where to be placed (I like to place it on my desktop). You should name it something that Pricescope's software has never seen before. I use random letters and numbers like kdghd4d. Click OK.

17. Now check the file for the pic. Minimize the iPhoto window by clicking on the yellow button in the upper left corner. Minimize any other windows too so you can see your desktop.

18. Right click on the icon for the pic. Select GET INFO, a new pop up window opens. The second line is size. If the size is between about 70K and 96K you are done.
If it is much smaller than 70K you may go back to step 13 to create a new pic with increased the resolution or size. Yes, this is more trouble but it will make for a larger clearer pic. If you don't care or want a smaller and lower-resolution pic then don't bother making a new one.
Note: PS says it can take files up to 100KB, but I've found I have to keep it under 96KB on my Mac for PS to see it as under 100KB.

19. To post your pic on Pricescope: After clicking on NEW THREAD or on REPLY, click on ATTACH FILE near the upper left corner.

20. In the new window click on CHOOSE FILE.

21. Direct it to the Desktop and find the file. You may have to scroll down to find it.

22. Click once on the name of the file and wait till the thumbnail appears in the window.

23. Click on CHOOSE.

24. That window will go away and in the window that remains click on UPLOAD in the lower right corner - you may have to scroll down to see it.

25. Wait a few moments till that window closes and the main PS window is all you see and the name of your pic appears near the top. If you get an error message you may have named it a name that PS has seen before or included characters that are not numbers or letters.

26. Enter your text and click on SUBMIT.
 
Nice Kenny, thanks!!

One more thing, (and I think it was Neatfreak who originally told me this), if the pic doesn''t need to be cropped or edited, there is a quick way to make sure it''s the right size.

Click export.
Change size to custom.
Change max dimensions to roughly 400px or thereabouts.

That usually gets in within the constraints!
 
Thank Porridge, great idea.
This simplifies the procedure.

(Edit, I have already changed step 15 above to incorporate this.)

I'm going to try this right here in this post.
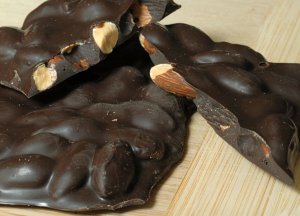
The attached pic is JPEG, medium quality with size of 900 px and ended up having a file size of 84KB.

See how large it looks:

c900 px 84KB .jpg
 
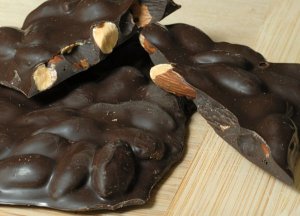
The attached pic is JPEG, medium quality with size of 600 px and ended up having a file size of 48KB.

c600 px 48KB.jpg
 
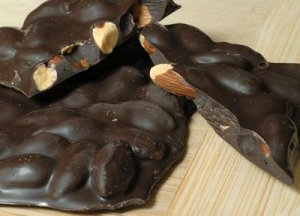
The attached pic is JPEG, medium quality with size of 400 px and ended up having a file size of 24KB.

Everyone of course if free to decide how large to make their pics.
I prefer the first one at 900 px.

I exported one at 1000 px but the file size came out to be 100 KB, which PS won't accept because it sees the file as 102 KB.

c400 px 24kb.jpg
 
Thanks for all the info about color adjusting, that was new to me. Maybe I can get my colored stones more true to life now. I will give it a try.
 
Date: 4/13/2010 7:36:10 PM
Author: LtlFirecracker
Thanks for all the info about color adjusting, that was new to me. Maybe I can get my colored stones more true to life now. I will give it a try.

One suggestion.
Try to include something in a far corner of your pic that you know is true white, like a piece of paper.

When you later adjust the color settings make that white area as pure white as the back ground white on your screen.
When you are finished adjusting the color crop out the paper.
 
That 900px does fit perfectly in my screen.

And I bet that chocolate would fit perfectly in my mouth...dammit Kenny, I am a woman, I can''t resist a picture like that!
 
That's the best dark chocolate almond bark in the world!!!!!!!!
The almonds are so crisp they shatter in your mouth and the chocolate is rich but light like like real whipped cream.
You don't even notice that you just ate 5 huge bars of it.

It's from Trader Joe's of course, and only an astonishing $2.99, or was it $1.99?

yummmmmmm.jpg
 
Send a little piece of that heaven over this side of the pond please
12.gif
 
Kenny, thanks for the tutorial. If I ever own a Mac I will make sure to come back and read this information.
 
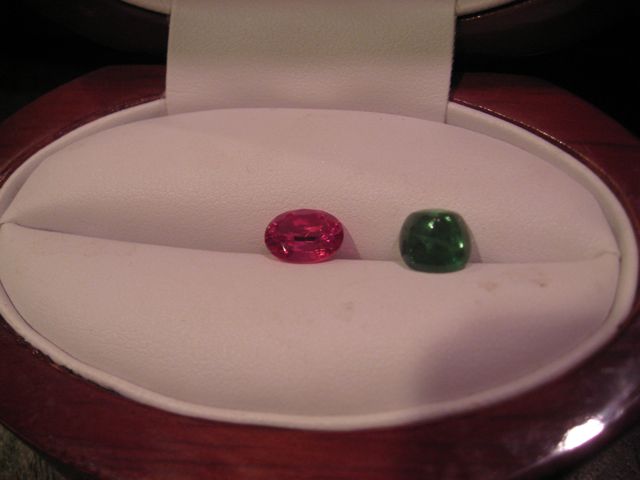
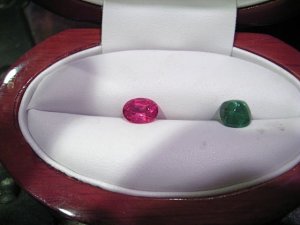
This is helpful - here is a pic of a couple of my colored stones before I knew all this cool stuff

sugartsavspinel3.jpg
 
If you have iPhoto, I'd brighten it up, fix the color balance to remove the reddish cast, and raise the shadows up, you could use the straighten tool to make that crease in the leather horizontal.. . . . . if I may say so.
 
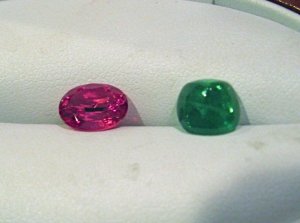
Here is a pic of a photo in the exact same lighting (taken on the same day) with some of Kenny's suggestions. I adjusted the enhancement, a little of the contrast, and increased the color saturation by a tad. I did not use the 2 features that add a colored tint to the photo. The stone looks much more like what I see.

Also, when looking for a file you just exported, you can also go to the "today" folder.

ETA: Saw your suggestions - what do you think about my changes?

swalatsavimproved1.jpg
 
Much better, but it would be fun to see how much better you could make the first pic by messing with it.
I assume you have a mac and iPhoto?
 
I tried your suggestions, a challenge, but fun. I feel like I just got a brand new version of i-photo

ETA: Yes I have a mac and iphoto. Been using a mac for the last year and a half.

swalaimprovements2.jpg
 
Thanks for writing this for everyone!! Hopefully it helps a lot of people.

Now, one for aperture and ps? ;) kidding.
 
Oh yes yes.
How fun.
Much better, now that you modified the first pic.
So again for everyone, her first and her third pic are the same pic, just modified with iPhoto's settings.

Next thing I'd do to the same pic is try a little sharpness and noise reduction, not too much though, it starts looking weird.
Noise reduction will reduce some of that graininess we see in the green stone.
 
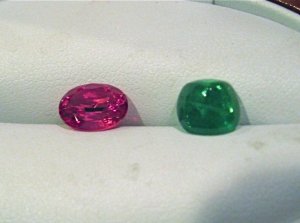
The noise reduction was like an airbrush, a little goes a long way, same with the sharpness. Here is the same pic with a minor adjustment on both.

Now, all I need is a camera like yours....

swalaspinelimpro3.jpg
 
Wonderful results.
 
Thanks :-). And thanks for taking the time to put this up.
 
Giving it a shot...it''s only 68K, so hopefully it''ll look okay.

couldprincesssmakeapicturework1.jpg
 
That was huge!

Trying again...

couldprincesssmakeapicturework2.jpg
 
Thanks so much, Kenny. This is really helpful.
 
I'd consider the boat pic perfect.

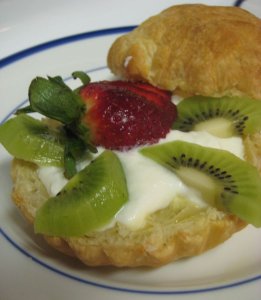
I'd raise the exposure on the fruit pic and increase the contrast. . . . not that you asked. . . .
37.gif


Oh and file size and how large it appears on screen are two VERY different (though related) things.
More later, I have to run.
 
Great thread, Kenny. Thanks for helping out the Mac-using forum newbies like myself
9.gif
I might have to experiment with this myself when I get home...
 
Okay let's talk about the word, size.
Unfortunately when talking about pics on computers, size can mean two very different things so it can get confusing.

Meaning 1 is how much memory the file takes up.
This is measured in bytes or kilobytes, or KB.

Meaning 2 is how large it looks on your screen.
This could be measured in inches, mm or pixels, or px.

Let me describe two scenarios:
ONE
It is possible for a file to be forced to take up moderate memory, lets say 50 KB, but take up only one inch on the screen.
(This will look very high resolution or sharp.)
It is also possible to modify that same file so it takes up the same 50KB of memory, but appear a whopping 8" x 10" inches on your screen.
(This will look very low resolution or fuzzy, even though it appears larger.)

TWO
Next it is possible that the same pic can be forced to be low resolution (takes up only a little memory) and appear, say, 6" across on your screen.
This will look fuzzier than the next example.
Then the same file can be forced to be higher resolution (takes up more memory) but ALSO appear the exact same 6" across on your screen.
This will look sharper than the previous example.

When exporting pics form iPhoto you get to select both of these "sizes".
What I do is experiment with various combinations and try to get the highest resolution and physical appearance size that is around 96 KB.

I will try to demonstrate scenario two now.
Unfortunately because of the limitations of iPhoto and Pricescope's 100 KB limit my example will not reveal a dramatic difference, only slight.

I'll present the same pic exported twice, so it looks the same physical size on your screen both time but at higher and lower resolution (file size in KB).
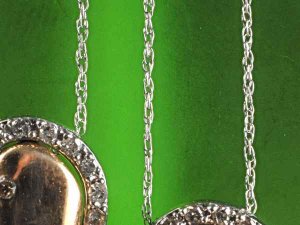
I took this pic and exported it first as higher resolution and 600 px.
I checked its file size and it takes up 96 KB of memory.

hi Res 600 px 96KB.jpg
 
Here is the exact same pic exported at the low resolution setting but the exact same 600 px or pixels. It takes up only 28 KB of memory compared to the previous one's 96 KB.
Look closely at the chains and compare the clarity. The difference is subtle.

Low Res 600 px 28 KB.jpg
 
The three chocolate pics above are an example of the exact same resolution (pixels per square inch) but with three different physical sizes on the screen (measured as pixels).

Notice how the larger one gets your mouth watering more?

So both definitions of size, resolution and appearance size, are important.
Try to keep them both as high as possible (near 96 KB and 900 and maybe even 1000 px).
 
Status
Not open for further replies. Please create a new topic or request for this thread to be opened.
GET 3 FREE HCA RESULTS JOIN THE FORUM. ASK FOR HELP
Top