shape
carat
color
clarity

A Solasfera pic

Status
Not open for further replies. Please create a new topic or request for this thread to be opened.

kenny

Super_Ideal_Rock
Premium
Joined
Apr 30, 2005
Messages
33,342
Having fun with the camera and the bling on Halloween night.

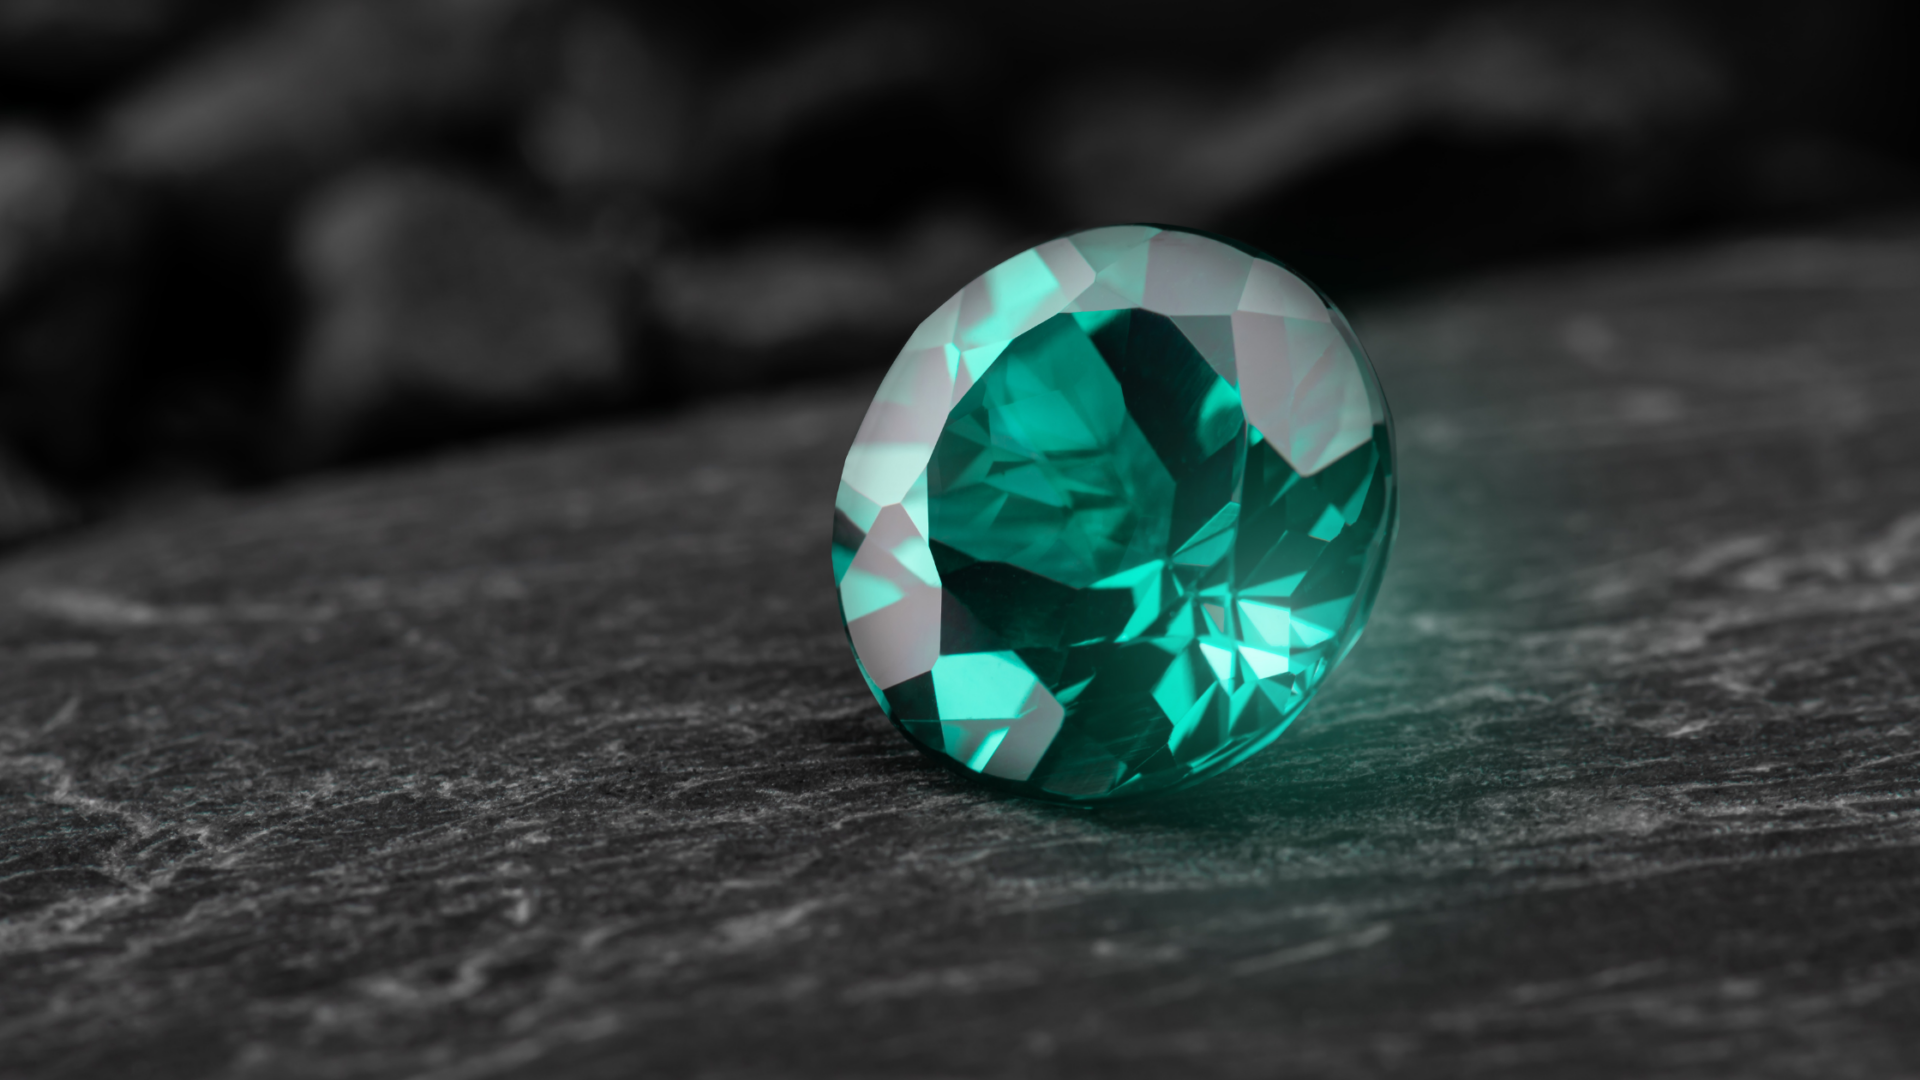
GIA says it's 83 ct F VS1.
Notice the 10 arrows instead of 8.
Gelin Abaci Platinum tension setting.

Note curved dark inclusion around 8 O'Clock under the table but near the edge of it.
It is a crystal and in most light is looks white.

That thing at 2 O'Clock is lint from a Q-Tip. GRRRR.

Can you say platinum patina?
3.gif


solmm.jpg
 

Skippy123

Super_Ideal_Rock
Joined
Nov 24, 2006
Messages
24,300
Gorgeous, how did you do that with the colors?
36.gif
36.gif
 

Cehrabehra

Super_Ideal_Rock
Joined
Jun 29, 2006
Messages
11,071
interesting that that is a VS1 - my stone is a VS2 and I cannot find the inclusions in a 10x... I have a cloud right in the middle under the table but I''ve only been able to see it with 30x. There are some feathers near the edges or something but again, have never seen them with 10x. I''m surprised that your tiny tiny little line showed up at all! I think with my stone they should have made it a K VS1 instead of a J VS2 and I sometimes wonder if they leaned toward a lower clarity because they leaned toward a higher color lol
 

kenny

Super_Ideal_Rock
Premium
Joined
Apr 30, 2005
Messages
33,342
I think I got a dirty VS1.
That's why I bumped it up to VVS stones after this one.

I'll post a pic showing the set up for these pics.
 

kenny

Super_Ideal_Rock
Premium
Joined
Apr 30, 2005
Messages
33,342
Date: 10/31/2009 8:23:01 PM
Author: Skippy123
Gorgeous, how did you do that with the colors?
36.gif
36.gif

Here's how.

Cut a hole in white cardboard.
Place camera behind the cardboard, and up against the hole. (in the second pick below I backed the lens away from the hole just so you could see the hole.)
Place colored things near the hole on the diamond side of the cardboard.
You could use colored tape, or put colors directly onto the cardboard using paint, colored markers or pencils.
Experiment, taking many test pics and moving colored objects around to get a pleasing balance of colors in your pics.

Place light source behind the diamond and facing the white cardboard.
This reflects light into the diamond.

I'll show later how this set up can inexpensively take beautiful soft white pics of diamonds. (just leave out the colored stuff.)

Again it solves the problem of getting light into the front of the diamond when the lens is too close and would block the light.

My apologies for this huge pic.

set up HM.jpg
 

kenny

Super_Ideal_Rock
Premium
Joined
Apr 30, 2005
Messages
33,342
Camera is behind cardboard.
Little lead weights hold down cardboard.

Notice that the camera lens is not touching the cardboard, just to show what's going on.
When you compose and take the pic press the lens against cardboard.
The smaller the hole the better, as long as you don't see the blurred edges of the cardboard in the pic. (Actually you can on the right edge of my asscher pic.)

Using an SLR makes all this easier but I'll bet you can do it with a point and shoot, if you are patient and do more experimentation.
Hey, we ain't paying for film any more.
1.gif


A macro lens and extension rings will get you the magnification you want so the diamond fills up the frame.

set up 2 hm.jpg
 

kenny

Super_Ideal_Rock
Premium
Joined
Apr 30, 2005
Messages
33,342
Opps, a teensy weensy typo.

It is an 0.83 carat, not an 83 carat.
6.gif


Oh, and I wonder how lining the cardboard with aluminum foil would change the look.
Photography is such a blast.
36.gif
 

Karl_K

Super_Ideal_Rock
Trade
Joined
Aug 4, 2008
Messages
14,762
How bright a light did you use?

btw you rock :}
 

kenny

Super_Ideal_Rock
Premium
Joined
Apr 30, 2005
Messages
33,342
Thanks Karl.

It is just a cheap CFL bulb from Home Depot.
It consumes 14 W but they claim it gives off the light of a conventional 60 w bulb.
It is in a reflector.

Not that it matters, but the bulb's color is 5500K.
This is the bluest of Home Depot's three colors of white, not that t matters because the camera is white balanced for this light source.

The exposures ended up being around 2 to 5 seconds at f16.
Obviously you need a tripod or set the camera on a table, then use the camera's timer so your hand does not vibrate the camera and blur the pic.
 

marcy

Super_Ideal_Rock
Premium
Joined
Feb 27, 2007
Messages
26,339
Very pretty! Great photo.
 

Imdanny

Ideal_Rock
Joined
Jan 21, 2008
Messages
6,186
Nice!! Thanks!
 
Status
Not open for further replies. Please create a new topic or request for this thread to be opened.
Be a part of the community Get 3 HCA Results
Top