shape
carat
color
clarity

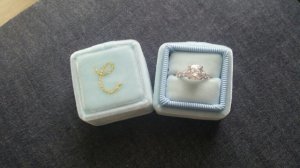
My handmade velvet ring box and cushion halo earrings

fussykiki

Shiny_Rock
Joined
Jun 28, 2011
Messages
453
Here is my handmade velvet ring box and tutorial. I did that in a hurry and I hope it make sense.

**edited by moderator, sorry we do not allow personal blog mentions or links**

So I figure maybe I should also show you my cushion cut halo earrings which my husband bought me as a gift of having our first baby last year. I don't quite remember the spec because I don't have the certs with me. They are 1 ct each, H color, IF and set in diamond halo. I will update the spec if anyone is interested. But this post is more about the RING BOX!!!
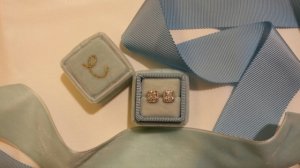
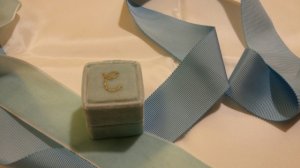
20150512_223655_resized.jpg

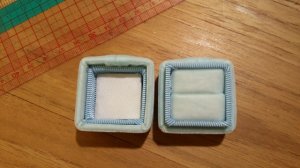
20150512_223821_resized.jpg
 
You are amazing and ever so talented! Great job with this! The box is beautiful! :appl:

Now you need to play around with adding a little hinge and making the box big enough for the wedding sets!
 
Phenomenal job! And those earring look stunning!! Would love to see close up pics:)
Thanks for taking the time to share the tutorial.

And I still think you should set up on Etsy for us not so crafty individuals!
 
wizardman123|1431445869|3875525 said:
You are amazing and ever so talented! Great job with this! The box is beautiful! :appl:

Now you need to play around with adding a little hinge and making the box big enough for the wedding sets!

It would be hard to source the hinge, I have not seen it in craft shops before. As for the size, making a bigger box is actually easier than making a small one. To accommodate a wedding set, just cut the sponge into three pieces instead of two. I will let you guys try that out, Coz personally I really like it petite. Hahahaha.
 
mns12|1431446426|3875530 said:
Phenomenal job! And those earring look stunning!! Would love to see close up pics:)
Thanks for taking the time to share the tutorial.

And I still think you should set up on Etsy for us not so crafty individuals!

Took me a total of two hours to make one. Don't think I can meet the customer demand. Try making your own, it is fun. :angel:
 
Omigosh fussykiki, thank you SO much for doing this!!! The box looks fabulous, I have some free time today and tomorrow, I'm going to buy the supplies and give this a try - it was so nice of you to take the time to make this tutorial, I am very excited! You are so talented and creative :appl: It might take me a while but I'm determined to do this!

And your earrings are to die for!!! :love: They are so so gorgeous…Congrats on the new baby as well!
 
will be trying this tomorrow, ill report back... im trying to think of how to add a hinge and maybe one of those hook enclosures...
 
Beautiful! :appl: And I love your earrings too. :love:
 
Thank you for the tutorial!
 
Your little box is beautiful! Are you going to be making yourself a few more? Thanks for going to the trouble of putting together a tutorial - I'm looking forward to trying it out!
 
Niel|1431451668|3875583 said:
will be trying this tomorrow, ill report back... im trying to think of how to add a hinge and maybe one of those hook enclosures...

What about using thin balsawood along with the paper cardboard to shape the box. Adding the wood on each cardboard box panel will allow you to have a more secure box and will allow you to mount a small "stop hinge" that would open 90-95 degrees. You could potentially mount a spring hinge (to snap open and close like a standard ring box), however, this may be too delicate for a spring hinge.

I may experiment first by making the box according to the tutorial and then head to the local hobby store to see what I can come up with for a hinged box.
 
AWESOME….these are absolutely beautiful!!! You are a very talented woman!! Thank you for sharing it to your blog as well!!
 
Ok, quick question…what is cardboard paper? I'm not familiar with it, but I've never really looked for it. In the pics it looks a little thinner than regular cardboard, can I get it at a craft store?
 
Love this! Thank you for sharing. I can't wait to see what the crafty PSers can do :appl:
 
Took a better picture. It is so cute!

About the cardboard, I used 1mm thick cardboard. Just regular one you see at craft shop.

Can't wait to see you guys' version, especially one with hinge. Have fun making your heirloom boxes.

img-20150513-wa0002_2.jpg
 
So impressive. How long did it take you to make?
 
minousbijoux|1431484611|3875870 said:
So impressive. How long did it take you to make?

Two hours from start to finish. The embroidery took a bit time tho.
 
Went to look at your blog. My, you are one talented woman! Love your clay flowers and self-made dresses! :appl:
Thank you for sharing this with us.
 
I'm assuming you fold the velvet in half inside out, sew it, then turn it right side out. Do you know the measurement point at which you sew it? I'm not much of a seamstress so that would help a lot :)
 
LuckyKelleyK|1431490845|3875896 said:
I'm assuming you fold the velvet in half inside out, sew it, then turn it right side out. Do you know the measurement point at which you sew it? I'm not much of a seamstress so that would help a lot :)

I didn't measure it, but I think it should be the same length I cut for the outer layer. So if you fold the ribbon in half (right side facing), you sew about 6.4 - 6.5 cm from the folded edge. I trimmed the seam allowance to about 4mm. And then you turn it right side out and wrap it on the outer layer. Hope it helps.
 
Last warning folks, no linking/routing people to personal blogs on PS. Feel free to import the instructions into this thread if the OP would like.
 
I was able to google your blog, and the tutorial is so helpful! I really appreciate that you put this together. I'm tempted to make one with a contrasting liner ...

Also, I adore your earrings! Cushions are my favourite!
 
Ella|1431492843|3875910 said:
Last warning folks, no linking/routing people to personal blogs on PS. Feel free to import the instructions into this thread if the OP would like.

Sorry about that. I don't mind putting the instructions here. But there are a lot pictures to upload which would take a while to do and it is my office hour now. I will have to do that later.
 
secretagentlaura|1431503583|3875933 said:
I was able to google your blog, and the tutorial is so helpful! I really appreciate that you put this together. I'm tempted to make one with a contrasting liner ...

Also, I adore your earrings! Cushions are my favourite!

Great, have fun making an unique ring box! I will try other different color combinations too. However, I found that it is hard to get high quality velvet ribbons. The one I used aren't soft to touch at all. I guess that's why they charge so much for Mrs. Box.
 
Thankyou for the tutorial :wavey:
 
Just to make sure I understand,how did you affix the top square (the embroidered part) to the square based the top.
I can understand how you would affix the square base to the bottom box, as it's got that inner ribbon box to glue it to. However I'm not sure what the top box has to attach itself to. You say you hot glued the top embroidered square,but what did you secure it to, exactly.
 
fussykiki|1431504773|3875938 said:
secretagentlaura|1431503583|3875933 said:
I was able to google your blog, and the tutorial is so helpful! I really appreciate that you put this together. I'm tempted to make one with a contrasting liner ...

Also, I adore your earrings! Cushions are my favourite!

Great, have fun making an unique ring box! I will try other different color combinations too. However, I found that it is hard to get high quality velvet ribbons. The one I used aren't soft to touch at all. I guess that's why they charge so much for Mrs. Box.

Not sure the quality, but there are cute colors of ribbon on different Etsy shops
 
Niel|1431519079|3875982 said:
Just to make sure I understand,how did you affix the top square (the embroidered part) to the square based the top.
I can understand how you would affix the square base to the bottom box, as it's got that inner ribbon box to glue it to. However I'm not sure what the top box has to attach itself to. You say you hot glued the top embroidered square,but what did you secure it to, exactly.

Same as the bottom, there is also an inner layer inside the top. At step 2, the 5x5 cm cardboard bit. See the picture.

img-20150512-wa0013.jpeg
 
Niel|1431519134|3875983 said:
fussykiki|1431504773|3875938 said:
secretagentlaura|1431503583|3875933 said:
I was able to google your blog, and the tutorial is so helpful! I really appreciate that you put this together. I'm tempted to make one with a contrasting liner ...

Also, I adore your earrings! Cushions are my favourite!

Great, have fun making an unique ring box! I will try other different color combinations too. However, I found that it is hard to get high quality velvet ribbons. The one I used aren't soft to touch at all. I guess that's why they charge so much for Mrs. Box.

Not sure the quality, but there are cute colors of ribbon on different Etsy shops

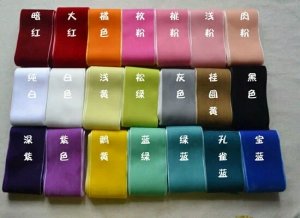
I found these from an online store. They are selling at less than Us$1 a yard. I suspect they probably as rough as sand paper. The colors are nice tho, Maybe I will order some to try.

1389059704.jpg
 
fussykiki|1431519673|3875988 said:
Niel|1431519079|3875982 said:
Just to make sure I understand,how did you affix the top square (the embroidered part) to the square based the top.
I can understand how you would affix the square base to the bottom box, as it's got that inner ribbon box to glue it to. However I'm not sure what the top box has to attach itself to. You say you hot glued the top embroidered square,but what did you secure it to, exactly.

Same as the bottom, there is also an inner layer inside the top. At step 2, the 5x5 cm cardboard bit. See the picture.

Duh. Ok. I don't know why I missed that.

You're the best!
 
GET 3 FREE HCA RESULTS JOIN THE FORUM. ASK FOR HELP
Top