shape
carat
color
clarity

Jordy's Gem and Lapidary Odyssey thread!

jordyonbass

Ideal_Rock
Trade
Joined
Dec 6, 2014
Messages
2,118
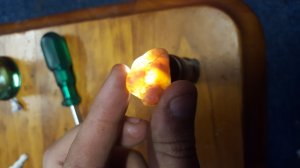
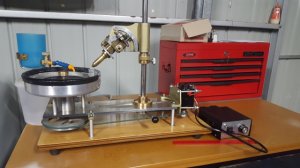
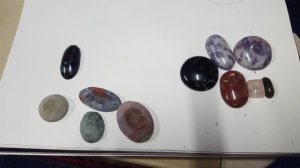
Just thought I'd drop in with this pic, we have begun working on cabs at home now with the new machine. We've started by using the freebies we got with the machine to 'break in' the wheels. When you first get the wheels for a cabbing machine you will find they can be a bit rough for their specified grit so the best thing to do is to cut some cheaper stuff to take away that rough outside layer and smoothen the wheel a bit more. This is proving to be vital with the 1200 grit diamond wheel I have as it should be polishing but it's cutting away more material than I want (I am considering getting a 1200 nova style wheel, any pros think that may be the way to go?). I also did dremel polishing today and the results have been quite pleasing! I just have to figure out a few little things for my polishing setup and develop my technique some more.
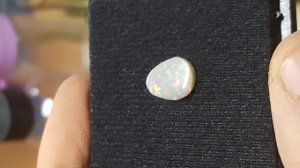
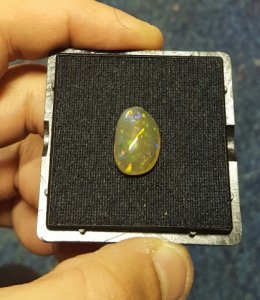
I'm hoping to get that little white opal finished as soon as I'm happy to use opal on the machine so hopefully it won't be too long until that's been fixed and finished!

Mrs Jordy has been doing silver wire wrapped pendants with the cabochons we've been making, if anyone is interested then I will post pics of those as well!
20160717_175040.jpg
 

jordyonbass

Ideal_Rock
Trade
Joined
Dec 6, 2014
Messages
2,118
THE OPAL CRUSADE CONTINUES

Sorry for the lack of updates everyone, busy with work but have been doing a bit of work at home with the new machine. I'd finally broken in the wheels on the machine to the point that on Sunday I was confident enough to start touching up the little white opal piece that I have posted a few pics of. I managed to roll out the last sand spots and the chip in the bottom with my 1200 plated wheel, leaving the shape a slightly baroque pear. After that I got the scratches out with the 3000 nova wheel and hand polished the stone on leather with cerium oxide. It came out at 11.23mm x 9.3mm x 2.7mm and 1.65 carats with a B3 brightness and N8 body color according to the scale that Justin at BOD uses (it's the only scale I know of for opal). To say I was happy to cut an opal with a beautiful colorplay is an understatement!! :bigsmile:

After this success I dopped 5 stones for us to work on this week, when I tackled another piece of opal I actually got quite a pleasant surprise. The initial inspection of the stone showed some blue, purple and green however as I removed the top potch layer I discovered a kaleidoscope of color with some beautiful red flashes. It is only a B1 in color with a body tone of N7 although it looks like it could nearly be an N6 which would make it semi black. It needs the back cleaned up but it's been hand polished and looking like it will be around 3 carats.

I began another piece on Sunday and while the color looks great, I got a very nasty surprise when I removed the sand. Inside the stone was a large cavity, like an air bubble. Unfortunately I had to remove nearly half the stone and still have to remove more but I will be able to salvage something from it thankfully.

Also I still plan on making the post for the faceting course soon, because I want to put pics in the post I have to wait until I have the confidence to attack one of my natural stones. For now it's lead glass while I hone some basic skills.

20160731_183341.jpg

20160802_160551.jpg

20160803_182953.jpg
 

jordyonbass

Ideal_Rock
Trade
Joined
Dec 6, 2014
Messages
2,118
NEXT OPAL HOME PROJECT

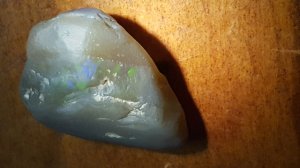
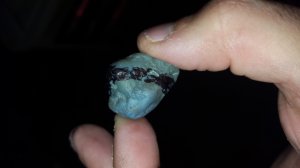
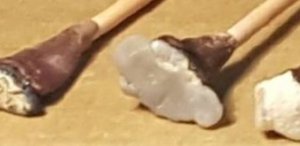
So this is the next piece that I'll be working on, it's 35 carats and showing some green and blue in the colour bar. But the angle on which the colour bar goes into the stone seems to make it disappear or very hard to find. So this one is going to test my skills and patience.

I've had some consultation with aussiejamie and what I am considering doing with this stone is marking around the outside of the visible area of the colour bar with a sharpie and then join the areas with a thinner line to give a rough idea where the colour bar should be. Then grind away the potch on the more nobby side of the opal, leaving some darker potch on the back. There is a bit of color in that nobby side but we both think it may be separate from the main bar and not worth trying to keep. Such is the gamble of Opal, when I was younger I used to play Poker so I guess that might be why I enioy opals so much :lol:

I'm hopeful of 7-8 carats from this piece, if I get 10 or more then you may see me dancing down the streets without clothes on :lol: :lol: :lol:

20160805_172037.jpg

20160805_170208.jpg
 

jordyonbass

Ideal_Rock
Trade
Joined
Dec 6, 2014
Messages
2,118
ANOTHER MACHINERY ADDITION TO OUR ADDICTION!!!

So when I picked up the cabbing machine a number of weeks ago I noticed the seller also had a faceting machine in his home workshop space. He made mention he had just bought a new faceting machine and wasn't entirely sure what he was going to do with the one he already had. So being as shameless as I am, I wrote down my details and asked him to please contact me first if he is considering selling the machine.

Well last Thursday I got that call and about an hour ago I returned from the 5 hour round trip to pick it up!! Now all I have to do is drag my butt down to the club and start honing my skills some more so I can start faceting at home!! :dance:

20160812_203146.jpg
 

jordyonbass

Ideal_Rock
Trade
Joined
Dec 6, 2014
Messages
2,118
jordyonbass|1470435800|4062910 said:
NEXT OPAL HOME PROJECT

So this is the next piece that I'll be working on, it's 35 carats and showing some green and blue in the colour bar. But the angle on which the colour bar goes into the stone seems to make it disappear or very hard to find. So this one is going to test my skills and patience.

I've had some consultation with aussiejamie and what I am considering doing with this stone is marking around the outside of the visible area of the colour bar with a sharpie and then join the areas with a thinner line to give a rough idea where the colour bar should be. Then grind away the potch on the more nobby side of the opal, leaving some darker potch on the back. There is a bit of color in that nobby side but we both think it may be separate from the main bar and not worth trying to keep. Such is the gamble of Opal, when I was younger I used to play Poker so I guess that might be why I enioy opals so much :lol:

I'm hopeful of 7-8 carats from this piece, if I get 10 or more then you may see me dancing down the streets without clothes on :lol: :lol: :lol:

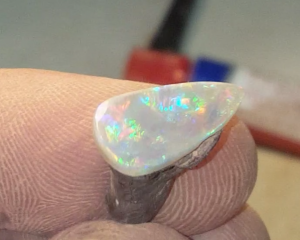
So I've just finished this stone and it's come out smaller than the 10 carats I wanted however it's come out far nicer than I was hoping!!

I tackled it exactly as I had planned however the plans changed through the cutting process; at first I colored around the colorbar and drew a line where it disappeared to basically connect the known areas for a rough idea of where that bar is orientated. From there it was as simple as grinding away the excess on the more nobby side with the 600 wheel until I started to get closer to where the color should have been, then switch to the 1200 to slow down the pace at which I was removing material. Slowly but gradually the color began to show.

After revealing the colorbar I encountered my first obstacle; I figured that leaving a potch back would make for a very narrow stone so I opted to get rid of it completely, planning for a typical cabochon half-round in a baroque shape. When the stone was at about 13 carats I sent a few pics to aussiejamie, who advised to cut out a grey potch area and try make it double sided as that would increase the beauty of the stone. After cleaning up the potch and both sides of the stone with the 1200, polishing out the scratches with the 3000 nova wheel and a Cerium Oxide hand-polish on leather I've finished this stone! :bigsmile:

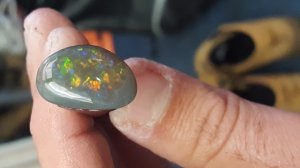
The final product is 6.34 carats, so nearly 29 carats were ground away to make this piece. But I'm absolutely over the moon with this opal, it shows beautiful oranges, greens, gold, violet and aqua blue flashes. But as with most opals it can be quite moody and be either very photogenic or hiding it's colors and right now it's being rather shy!!

The most important thing I learned with this stone is how to check the stone with a torch properly, marking out problems areas for removal, judging where a colorbar should be followed by finding it via removing excess, and most of all - PATIENCE!! :bigsmile:
I probably removed more material from this opal than a pro would but that's not something I am too worried about as it looks amazing. I'm over the moon right now :dance:

20160806_170758.jpg

20160813_164755.jpg

20160814_192508.jpg
 

Lovinggems

Ideal_Rock
Joined
Mar 28, 2009
Messages
3,622
Very cool stone and your description of the process is most interesting. Great job. :appl:
 

jordyonbass

Ideal_Rock
Trade
Joined
Dec 6, 2014
Messages
2,118
Thanks LG! I will try make my posts a bit more detailed than they have been lately although the thread isn't getting a lot of comments so I am not sure how much interest is in it at this point. Anyway I'll keep at it as it becomes record for anyone who may be interested down the track and does a Google search.

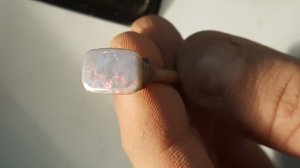
One of the things I have been learning about opal is that pre-conceived ideas or thoughts about a rough stone and it's potential can be let down severely or exceeded beyond any expectation. This little white opal piece is a prime example of the latter.

When I first inspected it I wasn't really too excited about the rough piece; it was slightly curved, looked a little potchy and while the color bar appeared thick it was hard to tell any kind of quality. As I removed part of the piece to make it flat and removed the potch skin, my jaw dropped - which it kept doing every time I looked at the face. This has become my favorite stone that I have done so far for a variety of reasons but mostly because of the transformation from rough to finished.

_38058.jpg

20160821_200424.png
 

theredspinel

Brilliant_Rock
Premium
Joined
Nov 14, 2015
Messages
1,148
Such beautiful last 2 opals. Jordy, don't worry about lack of comments, I've deifnetly been following along but been sick the past couple of weeks (as well as travelling) so only get time and energy to log in and read but not comment.

These posts are such a unique insight to a different part of the gems world and I for 1 love it! I'd almost guarantee most people here feel the same way I do.
 

Gloria27

Brilliant_Rock
Premium
Joined
Jul 21, 2015
Messages
984
jordyonbass|1471859115|4068558 said:
Thanks LG! I will try make my posts a bit more detailed than they have been lately although the thread isn't getting a lot of comments so I am not sure how much interest is in it at this point.

I always check this thread when you post something new, never commented until now: keep up the good work!
 

SapphireStyle

Shiny_Rock
Joined
Jan 12, 2012
Messages
338
I haven't posted as I have nothing to add to the discussion, but your thread is always one of the first I look at. I love reading about your progress and seeing the beautiful results!
 

Lovinggems

Ideal_Rock
Joined
Mar 28, 2009
Messages
3,622
Still reading and thank you for sharing your cabbing journey.
 

jordyonbass

Ideal_Rock
Trade
Joined
Dec 6, 2014
Messages
2,118
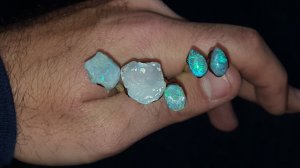
Oh wow, thanks for the responses everyone!! I'll definitely keep it going, I'm getting towards the end of my first opal package now but in true rockhound style I've just acquired some more. The bag I got is much smaller but has much higher quality stones in it than my first package, all white and crystal opal pieces (black opal has proven to be quite difficult). When I have the time and some daylight I will take a few snaps of the rough and post it as they look beautiful in their natural state.

Once I have cut that bag I will be doing more faceting and will update the thread then with my progress, obstacles and other bits of info for people who maybe interested in learning. For now the opal bug has me in a choke hold and isn't letting go :lol: :lol:
 

Nsmike

Rough_Rock
Joined
Jul 17, 2016
Messages
89
Jordy I'm following your progress. I suspect, that when you get your faceting machine set up, your first efforts will be be with glass. We're not supposed to discuss glass, but I wonder if Ella would allow you to show the process with glass, you can use the,' to contact us' button, at the bottom of the page to email her. I like learning about the process, your explanation on finding and aligning the color bar on opal, was enlightening. Now if some one would explain evaluating rough with stars or cat's eyes I'd be thankful.
 

Ella

Brilliant_Rock
Staff member
Premium
Joined
Jan 18, 2010
Messages
1,624
Nsmike|1471957392|4068946 said:
Jordy I'm following your progress. I suspect, that when you get your faceting machine set up, your first efforts will be be with glass. We're not supposed to discuss glass, but I wonder if Ella would allow you to show the process with glass, you can use the,' to contact us' button, at the bottom of the page to email her. I like learning about the process, your explanation on finding and aligning the color bar on opal, was enlightening. Now if some one would explain evaluating rough with stars or cat's eyes I'd be thankful.


Yes we would be happy to make an exception for this.

Jordy, if you do wish to post your glass process please note that you have my permission on the post.
 

jordyonbass

Ideal_Rock
Trade
Joined
Dec 6, 2014
Messages
2,118
Oh wow, thanks Nsmike for mentioning it and a big thank you to Ella for approving it. You were correct in assuming that I am practicing on lead glass at first to hone my skills, which is why I haven't made any detailed posts on it yet. I didn’t want to put up pics or descriptions of lead glass due to forum policy (I love this place and don't want to upset anyone). Originally I was going to wait until I had cut one of my Garnets before I made a post on the actual faceting course that we did but I may make that post soon and then a follow up post on learning to use our own machine.

And Mike, thank you so much for posting that Opal. I've been trying to work out how much that Crystal Opal may be worth and this gives me a good idea. Personally I like my stone better than the one in the link (this may be biased though :bigsmile: )
 

Nsmike

Rough_Rock
Joined
Jul 17, 2016
Messages
89
jordyonbass|1471977128|4069109 said:
And Mike, thank you so much for posting that Opal. I've been trying to work out how much that Crystal Opal may be worth and this gives me a good idea. Personally I like my stone better than the one in the link (this may be biased though :bigsmile: )
I also like yours better, the one I posted has a bit of a yellowish tinge, yours is a bright white. The other stone seems to have more pink so I can understand if someone disagrees.
 

jordyonbass

Ideal_Rock
Trade
Joined
Dec 6, 2014
Messages
2,118
I think we may be comparing different stones that I have cut to the one you posted as the crystal opal I cut also has that golden body color. I was more looking at size since mine is 6.33 and the one you posted is 6.2 cts.
Are you referring to the one I most recently posted a pic of? I love that stone so much and wish there was a way to post a video of it, it's got a whole lot of red in it when you hit the light on a certain angle. In fact, pretty much all the white opals I got from Justin originally have had red in them. I've fallen in love with Lightning Ridge material, it's just so beautiful.
 

Nsmike

Rough_Rock
Joined
Jul 17, 2016
Messages
89
jordyonbass|1471859115|4068558 said:
Thanks LG! I will try make my posts a bit more detailed than they have been lately although the thread isn't getting a lot of comments so I am not sure how much interest is in it at this point. Anyway I'll keep at it as it becomes record for anyone who may be interested down the track and does a Google search.

One of the things I have been learning about opal is that pre-conceived ideas or thoughts about a rough stone and it's potential can be let down severely or exceeded beyond any expectation. This little white opal piece is a prime example of the latter.

When I first inspected it I wasn't really too excited about the rough piece; it was slightly curved, looked a little potchy and while the color bar appeared thick it was hard to tell any kind of quality. As I removed part of the piece to make it flat and removed the potch skin, my jaw dropped - which it kept doing every time I looked at the face. This has become my favorite stone that I have done so far for a variety of reasons but mostly because of the transformation from rough to finished.
This was the stone I thought compared favorably to the one in this post. http://www.paraibainternational.com/product_info.php?product=3458&gclid=COjW26fQ184CFQataQod6PsMWA Jordy I did post a faceted crystal opal, in another thread, were you talking about that one? I think that the yellowish overtones are less appealing than a pure white base color.
 

jordyonbass

Ideal_Rock
Trade
Joined
Dec 6, 2014
Messages
2,118
Ah makes sense now! I like the white body color in white opals too but the golden body color in crystal also has a special place as well. I think the contrasting dark and light blues and greens against the gold in the big crystal opal I cut look great. But again, I'm biased hahaha.

I wasn't referring to that faceted opal at all but I do remember it and thought that I may give it a try at some point in the future. An opal with an emerald cut may be the next big thing!! :bigsmile:
 

jordyonbass

Ideal_Rock
Trade
Joined
Dec 6, 2014
Messages
2,118
MY FIRST EVER ROUGH GEM FIND...BY ACCIDENT!!

So I've been meaning to update this thread with the faceting post thread, however it was such a detailed course that it's going to take me a while to put it together and I just don't have the time with work at the moment. However my job has lead me to find my first ever rough gemstone!!

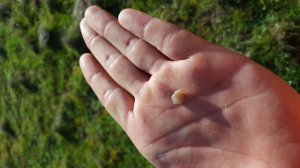
4 months ago I started a new job as a geotechnician for domestic housing, I have been training with the senior technicians who have backgrounds in fields ranging from former fence builders to geologists. Last week I was in an area that is known for it's Quartz deposits with a geologist and we were drilling holes to check what kind of concrete slab needs to be built and part of what we do is take handfuls of the samples off the drill and check what type of ground it is. As I was looking at the sample on the drill I spotted this little guy and the senior confirmed that it is a yellow quartz.

It wasn't really good enough to do anything with it but there is a river just a couple hundred yards away from the property :naughty:

20160831_083405.jpg
 

aussiejamie

Shiny_Rock
Trade
Joined
Nov 3, 2014
Messages
166
Congrats on finding your first gem mate! The opal from Pariaba international looks to be wello opal from Ethiopia. You are doing well!
 

jordyonbass

Ideal_Rock
Trade
Joined
Dec 6, 2014
Messages
2,118
Thanks mate! Just gotta hit that river now ;))

And thanks for the kind words although you are seeing a lot more of what I am cutting than this thread, I feel like I have posted enough opals already and should post something different once I cut it :lol:

Then again this is PS... :think:
 

arkieb1

Ideal_Rock
Premium
Joined
May 11, 2012
Messages
9,786
Wow your own machines, I will be sending stones to you for cabbing and cutting some time soon!!!! :lol: :lol: :lol: :wavey:
 

jordyonbass

Ideal_Rock
Trade
Joined
Dec 6, 2014
Messages
2,118
I'd be more than happy to give them a shot if you're willing to let a novice have a go at them Arkieb!!! :bigsmile: :naughty:
 

chrono

Super_Ideal_Rock
Premium
Joined
Apr 22, 2004
Messages
38,364
I don't always comment but I do read and enjoy the pictures. Please keep it up! :appl:
 

jordyonbass

Ideal_Rock
Trade
Joined
Dec 6, 2014
Messages
2,118
THE FACETING COURSE

First of all my apologies for neglecting the thread for so long, I have been very busy with work, fishing, cutting opals (will explain in my next post) and life in general. After months of speculating and promising to make the post regarding the faceting course, I have FINALLY sat down now to type it out. Well, it’s been typed over a number of sessions as I ended up just making a Microsoft Word document and added to it whenever I could. So here we go!

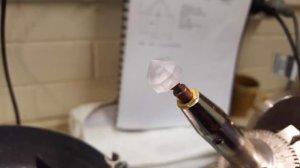
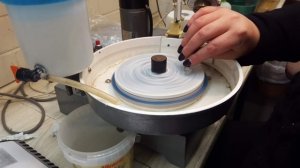
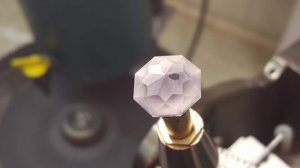
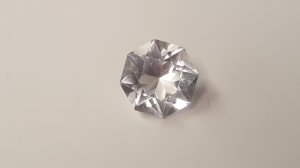
Back in June we were contacted to attend the faceting course at our lapidary club. While they teach cabbing and other skills in the open workshops, faceting can only be done by club members who have done the course. My guess why it is that way is to stop people who have no idea what they are doing from potentially messing up the equipment. The course itself was 2 x 8 hour sessions held over a weekend, the material we learned on was lead glass (for obvious reasons!) and the cut that we did was a ‘Swiss Brilliant Octagon’ or something similar to that.

We began immediately once all five students had shown up for the course; the instructor of the course was a very nice old fellow who has been faceting stones for 30 years. He brought in some sapphires, emeralds and rubies he had done in the past and to say they looked great would be a massive understatement. He also had an assistant with him who has been semi-regularly faceting stones for the last 5 years.
And when I say we began immediately, I really mean that as a slight criticism to the way the course was conducted; while I was already familiar with the equipment and some of the jargon that goes along with it, my wife and one of the ladies who attended the course were getting very confused and the instructor had to slow it down a bit and explain the equipment as he advised them to set the degrees and index but did not explain what they were or how to do it and why they are doing it. We also didn’t go through any of the pre-forming stages and the pavilion main facets were already half-cut, something I was slightly disappointed about but I can understand why it is done that way. There is a time constraint on the course and the instructor needs to achieve a balance between teaching as many skills as possible and ensuring everyone gets a stone finished over the 2 days.

So the first step was finishing the pavilion mains; the quill of the faceting machine holds the stone in place and you adjust the degrees the arm is sitting at and the index to ensure the facet is orientated flat, then bring the quill down on the mast to cut the facet. The further you bring the quill down on the mast, the closer the pavilion facet main will cut to the culet. However over-cutting means that facet may be across the culet, potentially causing big problems. So what I learned here was that I cut all the pavilion main facets at one height setting on the mast and check to see if the culet is still flat and the facets need more work or if it is at the desirable point. We started this process with a 600 grit diamond lap.
The next step was to cut the Pavilion breaks, it is basically the exact same process as the mains with a different degree and index settings to cut those facets on the edges of where the mains meet, still using the 600 lap. After this was done we did the girdle and something quite interesting starts happening. The lines of where the facets join will come to a point if you have cut the stone well, hence the name ‘meet-point faceting’. If they don’t meet at a point then that area will actually look quite misshapen.

Once all these facets were done, we followed the exact same steps again but this time with a copper lap and a 3000 diamond polish. This helps to remove the scratches that may have formed in the facets but doesn’t polish the face. One thing our instructor pointed out is that you want to count how many times you move each facet back and forth across the lap to avoid potentially messing up the meet points. After this process we changed the lap over to a plastic type of lap and followed the same steps again (mains, breaks, girdle) with a cerium oxide polish.

At this point half of the stone was finished and I was wondering how I was going to do the top; at this point the course instructor pulled out the transfer stations and I kind of felt silly when I saw how simple a solution it is to the problem. It is basically a clamp that holds the dopped stone so you can then put a do on the culet and work the star facets and table. No need for doing anything by eye, it does it for you!

After resetting the stone in the quill by ensuring the girdle was still flush with the lap when at 90 degrees, cutting the crown mains was first once the stone and this process is critical as this is also cutting the girdle down to that desirable thin facet. Cut too far like one of the other students did and it disappears completely, so that was something I was very wary of. Once those were done we cut the crown breaks and then followed by the star facets. Then 3000 diamond spray and cerium oxide to get the facets clean and transparent.

All we had to do was the table left and that was when we discovered the most irritating part about faceting – that squeak you get when polishing a well-cut table with Cerium oxide after you have cut it down. It’s almost like that sound you get when someone squeaks cutlery on a plate and is as irritating as nails on a blackboard :lol:

One major tip we kept getting was to not play with the cheater when cutting and using the diamond spray as it skews the facets as you go around, the major thing they kept saying is ‘you pay for it in the end’ if you adjust the cheater. They said it is OK to adjust during polishing since all the cutting has been finished but to always return it to the zero position when changing to the next facet.
I didn’t want to make this post too long-winded but rather just write a bit about the course and what the actual steps were in cutting from start to finish, I have also included a few pics from the course itself (thank you Ella for permitting this!). Please feel free to ask any questions if I have left out something you wanted to now!

_38508.jpg

_38509.jpg

_38510.jpg

_38511.jpg
 

jordyonbass

Ideal_Rock
Trade
Joined
Dec 6, 2014
Messages
2,118
WHERE WE ARE NOW

So despite having done the faceting course and now being the proud owner of a faceting machine and required accessories, I have BARELY even touched the machine. I did give it a test run with some lead glass and discovered that 2 part epoxy glue is no good for dopping stones so I bought some of the proper brand name stuff called ‘Dextone’.

The truth is that right now my wife and I are absolutely addicted to cutting opals. We have bought another 5 bags of rough stones since getting the first – and I am already starting to think about my next one! So as you could imagine we are starting to build up quite a collection of polished stones! I’ve been buying my rough from Justin at Black Opal Direct for a number of reasons; first, I have had some stones from the Mintabie and they do not even come close in comparison to Lightning Ridge stones. The colour play, durability, amount of sand and shape of the stones from Lightning Ridge are just so much better than the Mintabie stuff I bought. Second, Justin has been very helpful to me with questions that I have had about how to attack stones as well as other lapidary questions. I still speak with aussiejamie and get his advice however I am trying to both get varying opinions and let Jamie get some time to himself without my constant silly questions. Third, Justin and I share another common interest – fishing. So that gives me an instant bias to guy his stones :lol:

I will be going back down to the lapidary club soon to practice faceting with guidance from the club members who know how, however right now we are happy to spend our weekends hunched over the cabbing machine and cutting the beautiful colour play out of opals. Other stones now just seem so…….boring!
 

dk168

Super_Ideal_Rock
Premium
Joined
Jul 7, 2013
Messages
12,499
Looking forward to see more finished Opal pics, faceted stones can wait! :naughty:

DK :))
 

Lovinggems

Ideal_Rock
Joined
Mar 28, 2009
Messages
3,622
Still reading! Your first faceted stone looks pretty good. :appl:
 
Be a part of the community Get 3 HCA Results
Top