shape
carat
color
clarity

Calling LD and Other Jewelry Makers

minousbijoux

Super_Ideal_Rock
Premium
Joined
Aug 5, 2010
Messages
12,815
Okay, then apparently we have two - you and Chrono, who can't wait to get her hot little hands on a torch! :twisted:
 

yanaazul

Shiny_Rock
Joined
Aug 29, 2009
Messages
222
THanks LD, Chrono, pregcurious, and minousbijoux!

LD|1360940086|3380763 said:
Yanazul I've tried weaving with wire but when the frame is sloped, the wire keeps slipping so I can't maintain the neatness. I can see how it's easier to do on a circle but how do you stop it moving on a straight line going downhill? Even if I pull tight it still slips

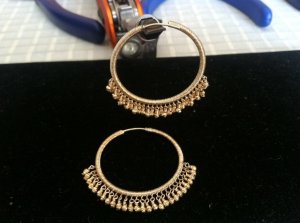
It does slide a lot, until I've done a number of wraps. Using dead soft wire makes it easier -- you don't need to pull as hard to wrap, so you don't pull everything out of place. But depending on what the project is, dead soft may not be sturdy enough for other parts of what you want to do. At least on a hoop, it will just slide along the curve, but on a sloped frame I can see how everything just slides to the narrowest point. Maybe a touch of superglue? I did that on a pair of teardrops where I didn't wrap the whole thing, just the bottom where the loops for the dangles were and I wanted to make sure it stayed centered. A toothpick, and a very very small smear, and then wrap the wire over it, two or three turns -- smear, and not a drop; too much and the glue squeezes up between the wraps.

I love the wire plait bracelet! That is a lot of coiling!

A tip on the center of the spirals being circular -- when you start the circle, instead of going only 360 degrees before spiralling outward, coil further to about 540 degrees or so, so that there's an overlap. Then, cut off the *short end* of the wire that isn't curved, the part that in your pictures are the centers of the spiral. Now the cut end of the wire that will be the center is curved inward. You still have an overlapped coil, though, not a spiral -- pull the long end gently outward until it clears the coil, and then use flat pliers, or press down onto a flat surface, to bring everything into one plane. Hope that makes sense. I tried to demonstrate for pictures, but couldn't get clear enough pictures of my tiny 28-gauge wire. When I'm back from vacation I can post pictures using heavier wire, if you want.

Damn! The wire wrapping is so even, flush and tight fit. My head is still reeling at your quality work. How long did this take?

Thank you! Wrapping the whole hoop took me about 45 minutes. The endless hoop earrings are quicker because of the open point where the post goes in the ear allows me to slip the wire back into the center of the hoop easily. Closed rings/teardrops take longer because I have to thread the wire back through the center to wrap -- working with five or six feet of wire in the beginning -- without kinking or overly twisting the wire. As you probably know, twisted or kinked wire creates brittle points that can break :errrr: , and the design hinges on being one continuous piece... So I have to go more slowly and carefully.

The dangles take me 3-4 minutes each, so for 27 dangles, about two hours. If I work continuously, which I never do, I'm easily distracted!

Yanazul, I cannot believe you made that wire wrap! What commitment, diligence and detail! That is some of the nicest wrapping I've seen. It is so fine, symmetrical and even. But I would go around with just one earring because I don't think I could bring myself to making the other!

Thank you! Let me tell you, making the one side is the best motivation ever to keep going, because one side finished triggers my "oooh, shiny" response and I want to wear my new earrings now, now, NOW. :lol:
 

chrono

Super_Ideal_Rock
Premium
Joined
Apr 22, 2004
Messages
38,364
Not only is your work fabulous, you do it very quickly too!
 

minousbijoux

Super_Ideal_Rock
Premium
Joined
Aug 5, 2010
Messages
12,815
yanaazul|1360983229|3381418 said:
THanks LD, Chrono, pregcurious, and minousbijoux!

A tip on the center of the spirals being circular -- when you start the circle, instead of going only 360 degrees before spiralling outward, coil further to about 540 degrees or so, so that there's an overlap. Then, cut off the *short end* of the wire that isn't curved, the part that in your pictures are the centers of the spiral. Now the cut end of the wire that will be the center is curved inward. You still have an overlapped coil, though, not a spiral -- pull the long end gently outward until it clears the coil, and then use flat pliers, or press down onto a flat surface, to bring everything into one plane. Hope that makes sense. I tried to demonstrate for pictures, but couldn't get clear enough pictures of my tiny 28-gauge wire. When I'm back from vacation I can post pictures using heavier wire, if you want.

Now that is a really good tip - it beats annealing anyday!

Let me tell you, making the one side is the best motivation ever to keep going, because one side finished triggers my "oooh, shiny" response and I want to wear my new earrings now, now, NOW. :lol:
I totally love this response! Please provide ear shots when you finish :))
 

yanaazul

Shiny_Rock
Joined
Aug 29, 2009
Messages
222
So, after I did about six of the moonstone dangles in the previous picture, it wasn't scratching my "I get to wear these!" itch. So I started over with faceted gold beads instead. And OMG, I am in love with these earrings. I'll probably wear them every day for a month, or something! I wore them yesterday and they felt so fun. (Isn't that weird, you can't even see your earrings on yourself, but I just love knowing they're there?)

I used normal pre-fab headpins for these. I like the look of the little end loop on handmade headpins for gemstone rondelles, but it looked funny on these beads. So thankfully my MIL knew where the local bead shop was!

yanahoop6.jpg
 

yanaazul

Shiny_Rock
Joined
Aug 29, 2009
Messages
222
Ear shots!

yanahoop7.jpg
 

LD

Super_Ideal_Rock
Premium
Joined
Jun 29, 2008
Messages
10,261
Thanks Yanazuul for the tip. TBH I only do this for fun and for things for me to wear. I'm not bothered if they're perfect or not!!!! I love your idea about superglue - I hadn't even thought of that one and will give it a go, thank you! What I love about making your own jewellery is that if you don't like it, you take it apart and start again so it made me smile when you said you'd changed earring stones.

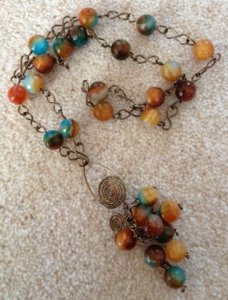
Here's yesterday's make that was worn today! I made all the links by hand and the stones are agates.

wirework_chain_necklace1.jpg
 

yanaazul

Shiny_Rock
Joined
Aug 29, 2009
Messages
222
Oh I love that, LD. Perfect metal for the agates, and the center spiral bail is really cool.

The colors of the agates are very "earth and sea" to me. (Probably influenced by the fact that I am in Hawai'i right now.) Mother Nature really knows best when it comes to color harmony, no?
 

minousbijoux

Super_Ideal_Rock
Premium
Joined
Aug 5, 2010
Messages
12,815
Earth to sea is a great description! LD, I love those colors! They're perfect.
 

minousbijoux

Super_Ideal_Rock
Premium
Joined
Aug 5, 2010
Messages
12,815
Yanaazul, sorry, I forgot to comment on your earrings! They are lovely. I know exactly what you mean about not being able to see it but just knowing how awesome they look makes you happy. Enjoy them, you earned them. Btw, what are you making for your MIL? :praise:
 

chrono

Super_Ideal_Rock
Premium
Joined
Apr 22, 2004
Messages
38,364
Off topic but I've been wanting to know how a person wears such an earring! I have hoops with the same type of "stick the pin into the tiny hole that I cannot see behind my ear" style. I end up with achy arms, strained eyes and red sore ears after struggling for nearly 15 minutes to put one on. Is there a trick to wearing this type of earring painlessly and quickly? :sick:
 

minousbijoux

Super_Ideal_Rock
Premium
Joined
Aug 5, 2010
Messages
12,815
Chrono|1361160463|3382874 said:
Off topic but I've been wanting to know how a person wears such an earring! I have hoops with the same type of "stick the pin into the tiny hole that I cannot see behind my ear" style. I end up with achy arms, strained eyes and red sore ears after struggling for nearly 15 minutes to put one on. Is there a trick to wearing this type of earring painlessly and quickly? :sick:

:lol: :lol:

Put your kids to work! ;))
 

chrono

Super_Ideal_Rock
Premium
Joined
Apr 22, 2004
Messages
38,364
No thanks; either they'll ruin the earrings or rip my ears off instead! :errrr:
 

LD

Super_Ideal_Rock
Premium
Joined
Jun 29, 2008
Messages
10,261
Chrono|1361160463|3382874 said:
Off topic but I've been wanting to know how a person wears such an earring! I have hoops with the same type of "stick the pin into the tiny hole that I cannot see behind my ear" style. I end up with achy arms, strained eyes and red sore ears after struggling for nearly 15 minutes to put one on. Is there a trick to wearing this type of earring painlessly and quickly? :sick:

You twist the earring open slightly (left and right) and then put the post through your ear. To do them up you let them naturally fall together and then put some tension onto the front part of the earring to hold still and then pull back gently on the back part of the earring and by feel you can slot the post into the hole.
 

chrono

Super_Ideal_Rock
Premium
Joined
Apr 22, 2004
Messages
38,364
The problem is that I can never find the slot once it's on my ear and I'm trying to close the earring. Could this be because the hoop is smaller? You'd think it'll be easier because the earring is softer (22kt gold).

hoop_earrings.jpg
 

LD

Super_Ideal_Rock
Premium
Joined
Jun 29, 2008
Messages
10,261
No it's not the metal. I think you've just not got the knack yet Chrono. With those ones the post goes into the hole doesn't it? So when in your ear, you pull them gently apart (like you're stretching it) and then the wire will pop into the hole. They are fiddly but when you've done it once you'll find it much easier. Hold the earrings front and back near to clasp so you get a good leverage.
 

minousbijoux

Super_Ideal_Rock
Premium
Joined
Aug 5, 2010
Messages
12,815
fwiw, Chrono, you are by no means the only one with this problem. Whatever you do, don't go near a mirror and try to use that as a guide! :lol:
 

chrono

Super_Ideal_Rock
Premium
Joined
Apr 22, 2004
Messages
38,364
LD,
I will try again per your advice when I feel up to it. I've already made the earring off-round with my stretching of the hoop on numerous tries. You are right that I clearly haven't the knack for it yet.

Minou,
It is impossible to see the back of my ears with a mirror. :lol: I do attempt it in front of the mirror anyway in the hopes I can see something.

I'm sorry to have completely threadjacked this lovely thread on jewellery making. Back to your regularly scheduled programme.
 

minousbijoux

Super_Ideal_Rock
Premium
Joined
Aug 5, 2010
Messages
12,815
Okay, one last comment on the threadjack. While I really like these types of closures in theory because they seem safe and secure, I too end up with misshapen ear wires, etc. from trying and failing to get them in correctly. I also run the risk of eventually breaking the wires, as I sometimes bend them out of shape and then have to bend them back again.
 

minousbijoux

Super_Ideal_Rock
Premium
Joined
Aug 5, 2010
Messages
12,815
But LD, so as not to lose the most important thing, did you see that I love your necklace and the colors? Really, aren't you making too much to handle these days? :naughty:
 

LD

Super_Ideal_Rock
Premium
Joined
Jun 29, 2008
Messages
10,261
minousbijoux|1361220212|3383380 said:
But LD, so as not to lose the most important thing, did you see that I love your necklace and the colors? Really, aren't you making too much to handle these days? :naughty:

Yes thank you and no!!!!! :lol:
 

yanaazul

Shiny_Rock
Joined
Aug 29, 2009
Messages
222
Chrono, I will note that the posts on your earrings appear to be hinged? So that the post can swing up and down -- this would make it much more tricky to find the hole in the tube because the post can swing out of the curve of the circle and out of alignment with the back. The earring findings that I use have fixed posts -- always in line with the curve of the circumference, so that they almost automatically snap back into the hole. (This is probably a high-end vs. mass produced issue -- yours are solid gold and have the hinged craftsmanship, the components I buy just have a post soldered into a tube.)

My only suggestion for yours would be, when you're putting them in, don't insert the post all the way, so that you can still see some of the post past the hinge in front of your ear in the mirror. Checking that the post is still aligned along the circle, hold across the hinge firmly so that it stays that way, and then pull back the other end to slip onto the post, as LD explained.
 

chrono

Super_Ideal_Rock
Premium
Joined
Apr 22, 2004
Messages
38,364
Yanaazul,
Yes, the earrings are hinged and yes, they move up and down infuriatingly when I'm trying to line the post up. :angryfire: Darn it, I need the mass produced ones that stay still. :bigsmile: So you are suggesting that I insert the post just enough for it to come out the other side of my ear, right? Ah....holding the hinge will help stop it from moving. All right, I feel more confident about trying it this way. Thank you so much to you and LD. :appl:
 

Nicki

Shiny_Rock
Joined
Jun 21, 2007
Messages
278
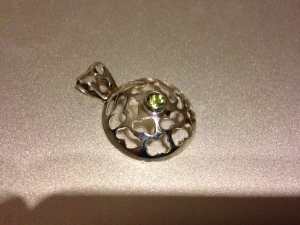
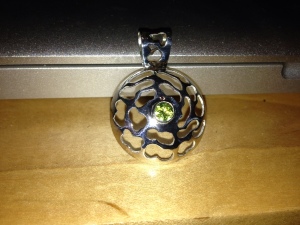
Spent my free day off yesterday making this pendant:

The stone is a demantoid garnet (don't remember the carat weight off-hand) set in sterling silver. :)

demantoid_pendant_2.jpg

demantoid_pendant_1.jpg

This project has been hanging around in my brain for a while. My first attempt at making the lattice dome ended in disaster, so a new approach was needed to get it to work...and it did!
 

chrono

Super_Ideal_Rock
Premium
Joined
Apr 22, 2004
Messages
38,364
Nicki,
You did the cut-outs then filed them down for a more precise shape? I'm amazed!
 

Nicki

Shiny_Rock
Joined
Jun 21, 2007
Messages
278
Chrono|1361287814|3384241 said:
Nicki,
You did the cut-outs then filed them down for a more precise shape? I'm amazed!
Yup! Lots of piercing, then a bit of filing to eliminate little inconsistencies and even out the shapes a bit and finally cleanup with a diamond burr when I got tired of filing. lol
 

minousbijoux

Super_Ideal_Rock
Premium
Joined
Aug 5, 2010
Messages
12,815
Nicki: that is lovely! Nice choice on the demantoid as I suspect that despite its small size, it commands attention.
 

LD

Super_Ideal_Rock
Premium
Joined
Jun 29, 2008
Messages
10,261
Oooooooo luverly! That's not an easy look to achieve so fantastic result x
 

Circe

Ideal_Rock
Trade
Joined
Apr 26, 2007
Messages
8,087
Yana, LD, Nicki - wow! I love what you're doing. Yana, those earrings are classic - I would snap those up in a heartbeat if I saw them for sale! They look like something out of a fairy tale. LD, seconding whoever said you could totally start a business selling the copper hearts - they're utterly, absolutely charming. Nicki, that is such a cool design! I love how you did the bale.

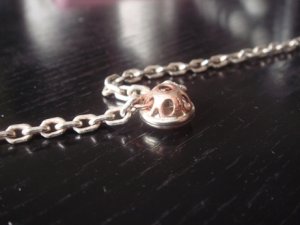
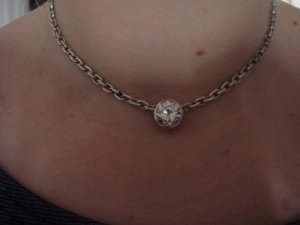
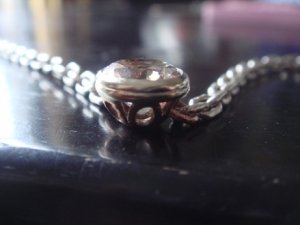
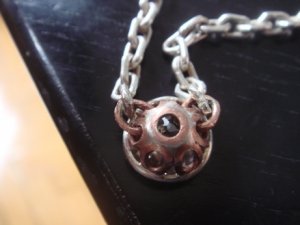
I've been messing around with the technique I used for the ring, and wound up with two more necklaces - one a single-baled pendant, one a non-sliding set necklace, short enough to sit right at the hollow of my throat. I like making these - perfect balance of being labor intensive, but not taking *so* much time that I lose interest in the project.

Shorty first:

ps_5_atomic_pendants_024.jpg

ps_6_atomic_pendants_023.jpg

ps_8_atomic_pendants_021.jpg

ps_12_atomic_pendants_016.jpg
 

Circe

Ideal_Rock
Trade
Joined
Apr 26, 2007
Messages
8,087
And the longer one ... I love fiddling with this one. Something about the three-dimensionality of it is very pleasing to me.

ps_4_atomic_pendants_009.jpg

ps_2_atomic_pendants_002.jpg

ps_1_atomic_pendants_001.jpg
 
Be a part of the community Get 3 HCA Results
Top