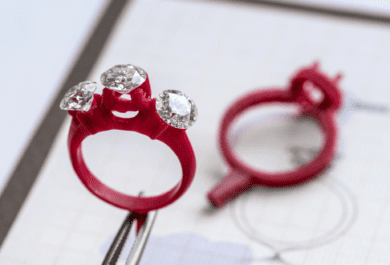
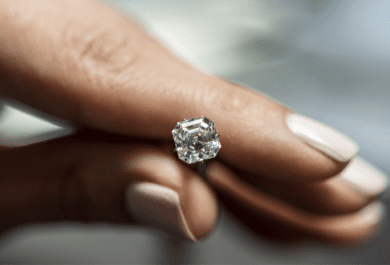
Spring Engagement Rings
If you are looking to pop the question this spring, we have you covered for engagement ring shopping. We’ll add some proposal ideas too to inspire you when you take…
Making a piece of jewelry is always a challenge but it’s easier if you work it through in your mind before you begin, and then convince yourself that this is a good starting point.
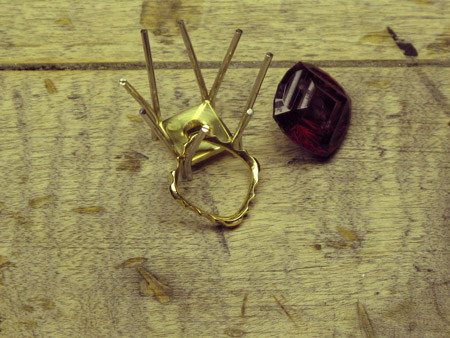
The gem I am working with is a lovely and unusual cut, a square cushion shaped garnet with a modified step cut crown and multi-faceted pavilion. A stone like this gives me an opportunity to show off a little.The faceting on the top of the stone has a square pattern, so I will start my design by using this pattern on the back of the pendant.
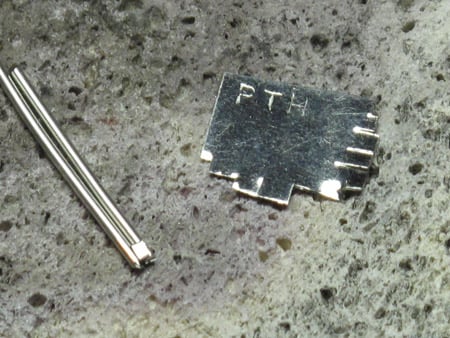
1. The divider pictured is used to mark out the shape, the thin thread across the top is the sawblade, and the wood it is laying on is the bench pin, which works for cutting off the sides and piercing out the center. Again, this plate will be at the back of the finished pendant, lying against the skin.
I learned early to leave little “handles” on the metal to hang onto when you make something, the different pieces can be small and it makes them easier to hang onto during the process. You then cut them off when you’re finished.
The soft focus shows the layout best.
2. I then work my way up from the back to the top or under bezel on this piece. Next up is making the prongs.
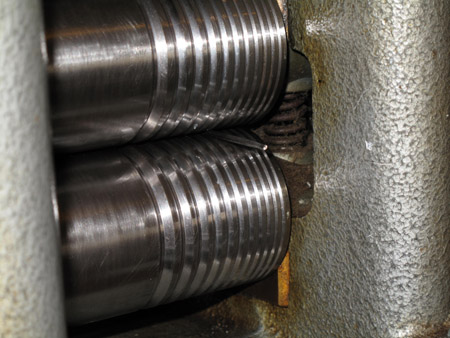
I decided to make them in platinum because I can go a little thinner on the diameter. Then they will be easier to work around because of the higher temperature they are able to withstand when assembling (so as not to melt or collapse) and I decided they are nice looking.
The picture below shows a small piece of square Platinum wire between the rollers of a mill that squishes the metal into the size you need.
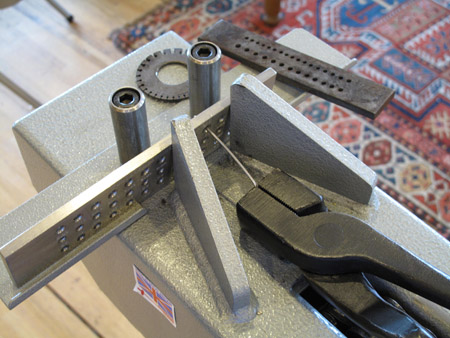
3. Then, you taper the end of the wire and pull it through the plate (pictured below) with the holes in it until you get to the gauge or diameter you want. This is done on a drawbench—or, for the youngsters, by just yanking it through the plate with pliers. In a pinch you can make round wire by hammering.
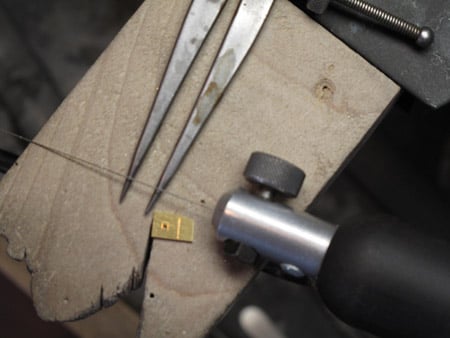
4. The picture below shows 2 short wires with a chip of platinum solder, which is ready to heat to make a twin prong. You protect your eyes with welding goggles because it becomes so bright from the heat used for platinum.
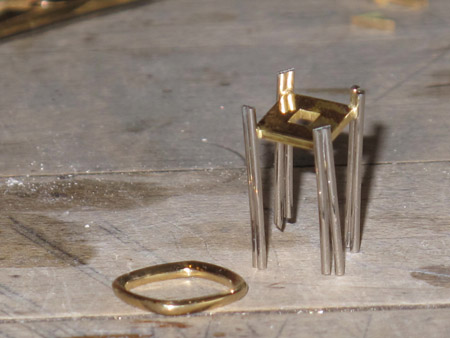
5. Picture 5 shows the prongs soldered onto the lower plate along with the roughed out upper bezel. The upper bezel fits just below the girdle of the stone. It is up to the jeweler whether to “trap” the stone against the upper bezel, or to “suspend” the stone just above it. All the parts are polished /burnished in a handmade piece before assembly.
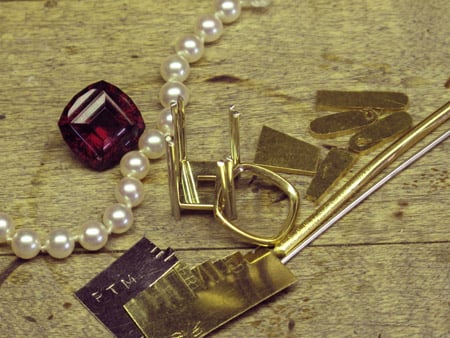
6. When I began this piece my impulse was to accent it with a diamond(s), keeping the design simple because the stone is pretty busy on its own. I used a flat sheet of wax and pressed the stones on it. The wax is sticky so you can move the stones around to get a feel until something is appealing or looks right.
Every diamond I looked at seemed to pull a little out of the garnet rather than adding something, so I then laid out some Akoya pearls next to the garnet. It was immediately obvious this was the best choice. I saw that putting the corners of the cushion shaped bezel between the prongs would not (mechanically) work, and that had to be rethought.
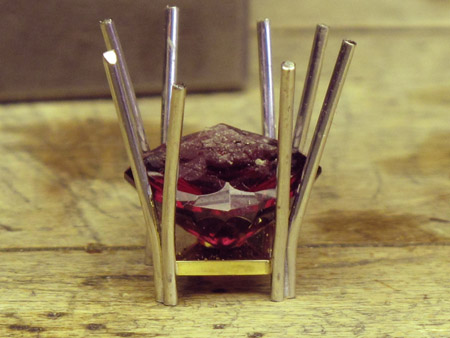
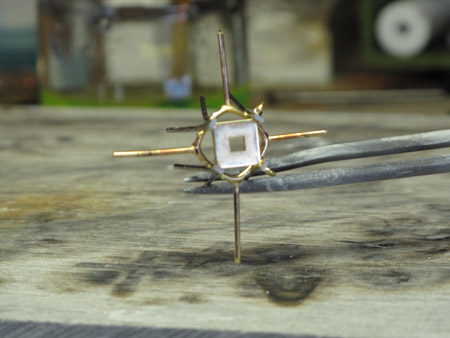
7. For me, this is when building something from scratch becomes a lot of fun. I can see it will work because if I pivot the stone in the setting, it lowers and tightens it up. If you look at the prongs in the photo below, you’ll see they are a little rough in the center. This was caused when the weld went too high. I softly tapped between the prongs with a razor blade to drive them apart.
8. The back or pavilion of this stone is covered with divots or concave facets. I shaped the upper bezel using files to resemble this. The next step is to then solder it into the group of prongs.
The first prong soldered when fitting the upper bezel is the trick…you have to be able to center this part properly. Once soldered, you bend the other prongs around the bezel, soldering them one at a time and then double checking after each solder to make sure it still looks straight and doesn’t loose its sense of symmetry.
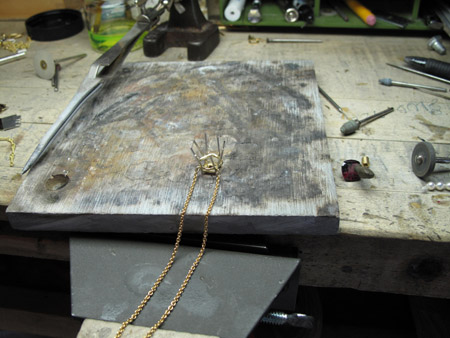
9. When I soldered the upper bezel in place I made the final decisions on how I thought it should look. The pendant has become a necklace.
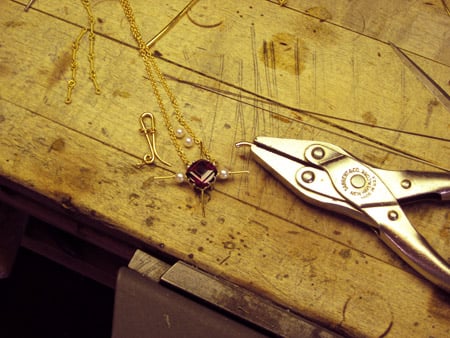
10. The solder used was 18k yellow gold easy flow. When adding something such as a piece of round wire as pictured below (to hold on the pearls), the easiest and quickest way to do it is pick the wire up with locking tweezers, flow the proper amount of solder onto the wire, heat up which piece is larger first, then gently but firmly touch the wire to the spot you want to attach it to, and let it flow. On this piece I countersunk, or drilled a pilot hole into the spot I needed it to be. This helps guide the solder and guarantees that the joint will not fail though the rigors of wearing.
11. As I said in the beginning, thinking ahead is essential when designing jewelry. At this point I have drilled out the center of the larger wire in my pliers. I then cut off the end of this wire, giving me a small donut shaped fastener. I can slide this onto the end to hold the pearl in place.
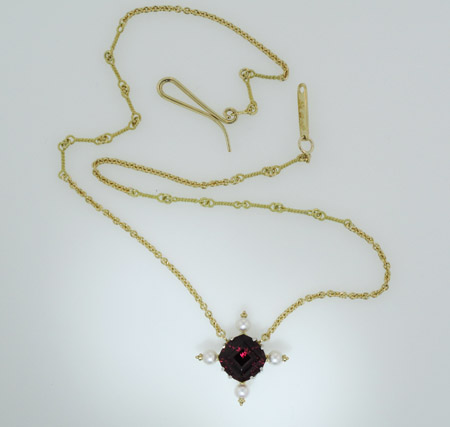
The chain I started with is a temporary one, used only to see how the piece will hang. (Of course if it’s not hanging properly, it’s a little too late for changes.) At this stage I look to see how I can use other styles, sizes, colors of chain, I kind of like the piece that I had sitting out (upper left of photo) and will use it in sections. I know I need a clasp, so making it now instead of at the end gains me a little time to mull over how I want to finish it. The clasp looks like a fish hook in the picture.
12. The next few steps all involve assembling and attaching the chain and pearls, burnishing and polishing to make it bright. The necklace is finished! This is the back.
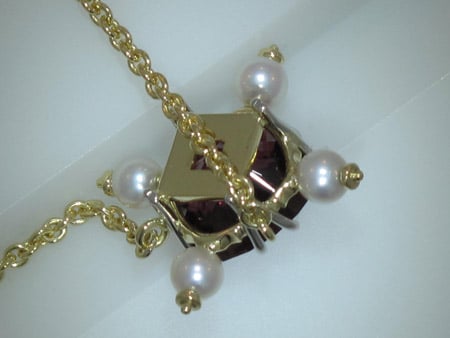
13. And, this is the front.
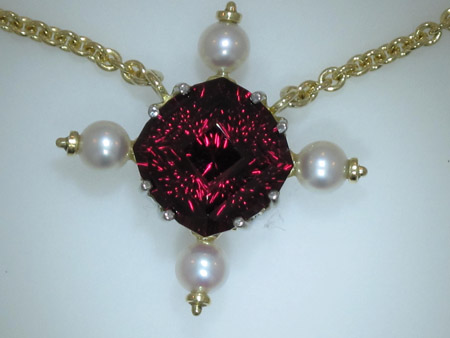
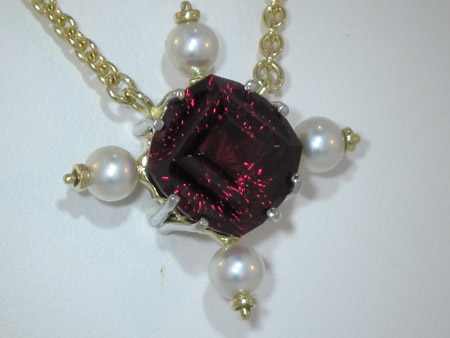
14. Another look.
15. And finally a picture of the finished necklace that shows the scale of the piece.
This necklace was entirely made, heat wise, with a midget torch which works on natural gas and bottled oxygen. A remarkable tool that has become almost commonplace in an American jewelry shop is the laser welder, a tool that uses hot light to weld, rather than solder, metal components together. Using a laser has changed everything about building a piece of jewelry. This may be the last piece of jewelry I make using the torch….
by Jim Summa
Summa Jewelers
![]()
Click here to discuss on the Forum

Retail Diamond Prices Chart Updated Monthly.
If you are looking to pop the question this spring, we have you covered for engagement ring shopping. We’ll add some proposal ideas too to inspire you when you take…
We don’t talk about birthstones every single month, but we love any opportunity to talk about our favorite gemstones. Diamonds are among our favorite gemstones. The diamond is the birthstone…
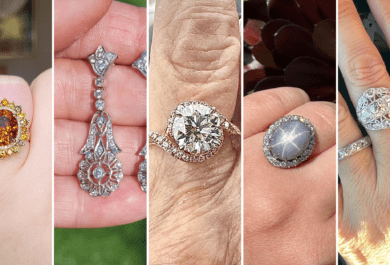
So long, March; hello again, April. We love seeing all the new jewelry pieces posted by PriceScope community members! We are thrilled to see that your collections are growing beautifully,…
 is an easy tool that analyzes the data of round diamonds and calculates a score that grades cut quality.")