The Finest Engagement Ring Brands
Choosing an engagement ring is a significant milestone in one’s life journey, and finding the perfect brand can make this experience even more memorable. Some brands stand out among the…
I am often asked about the process for creating a custom designed piece of jewelry with the use of CAD (Computer-aided design).
CAD has been a great innovation for helping people see what they are going to get before they actually commission a piece of custom-made jewelry. The cost is minimal, and many revisions can be made until it is clear that both the customer and the jeweler understand what the other wants.
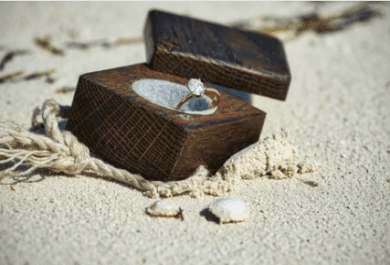
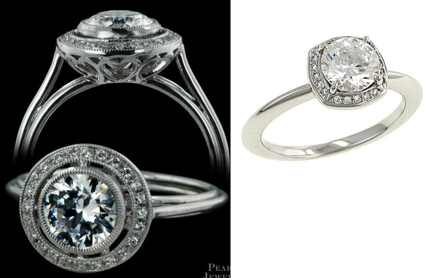
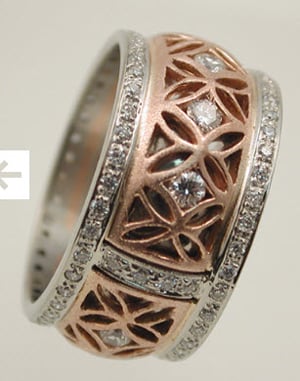
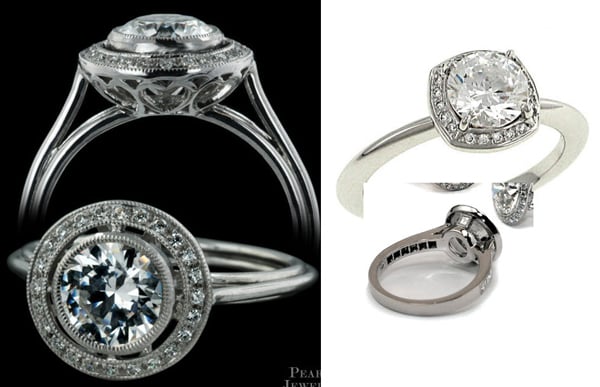
This can be a short and simple process or a long and convoluted process. A lot will depend on how well you know what you want. For example, one of my clients sent me several pictures of things that she wanted in her ring. She had asked on Pricescope’s Forum for advice and had gotten many potential designs and design elements.
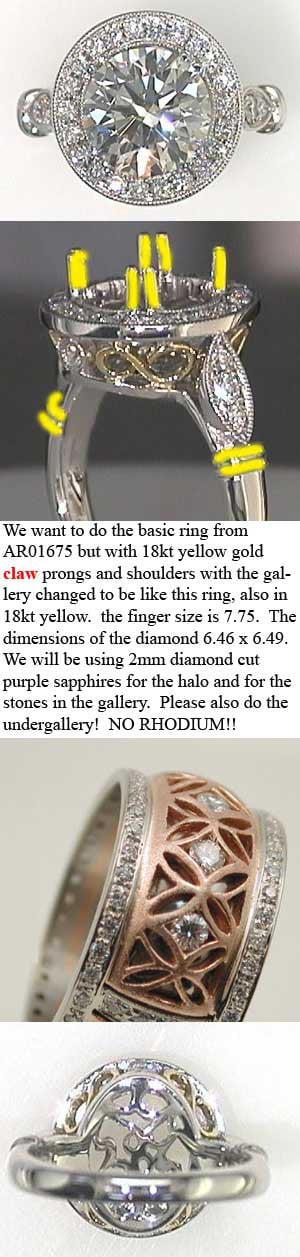
Here are a few of the many pictures that she sent me.
After many e-mails here is what we sent to our CAD artist to tell him what we wanted incorporated into the ring.
This is what we got back from our CAD department and sent to our client.
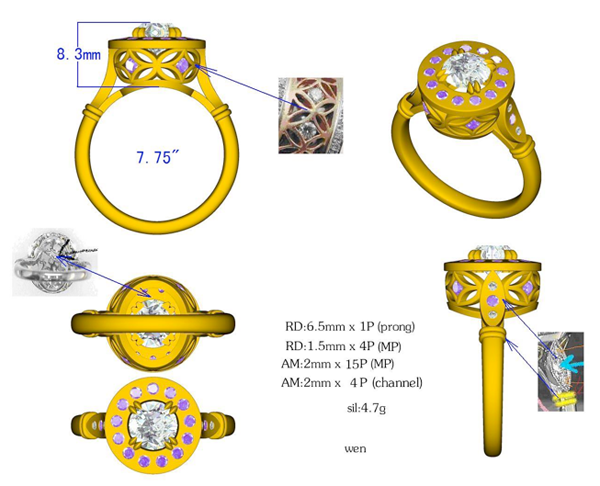
xxxx, here is the quote for your ring. Please let me know what you think. As you will notice I have asked them to put two accent diamonds on either side of the sapphire in the marquise shaped gold on the side. The ring is shown in yellow, but will be yellow and white when made.
Wink
To reiterate. The prongs, gallery and shoulders in 18kt yellow. The rest in 18kt white. NO RHODIUM plating!
As you can see, the depiction of the setting leaves a lot to be desired. The beads do not show, so it looks like there is entirely too much space between the stones. Fortunately, as you will see in the pictures of the finished ring, the CAD designers actually do know what they are doing and the bead setting will look perfect once it is finished.
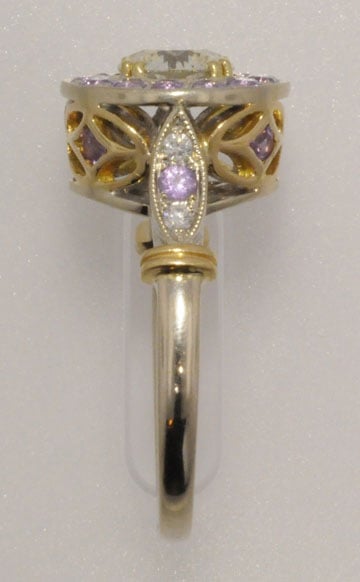
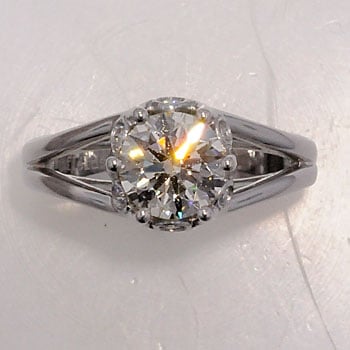
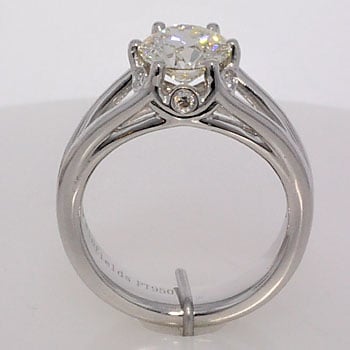
These next photos show you the result of the collaborative effort between my client, the supportive ladies of Pricescope, my CAD artists, and myself.
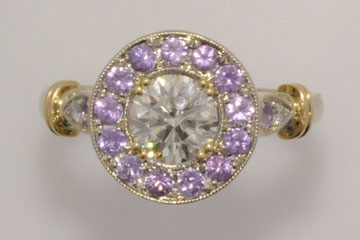
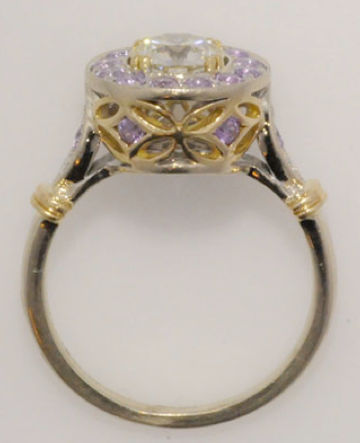
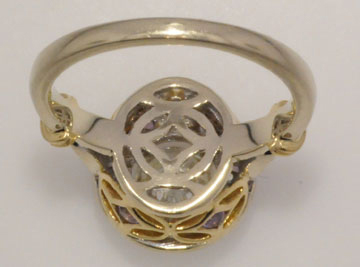
By the way, the under gallery in this last picture is vital for the comfort and wearability of the ring. You may notice that the CAD artist chose to make the under gallery with the same design elements of the side gallery. This under gallery both makes the ring more comfortable to wear and allows moisture to escape rather than being trapped against the skin.
While seemingly complex and taking months to finish the design process once the CAD was made and accepted by our client it was a relatively short process to finish the ring.
It is not always this easy. Sometimes a client will come to us with a very solid idea of what they want, not realizing that technically some of the design elements may be impossible to render.
* * *
Also, there can be issues with translating concepts and desired features into an actual design. This can be very frustrating at times.
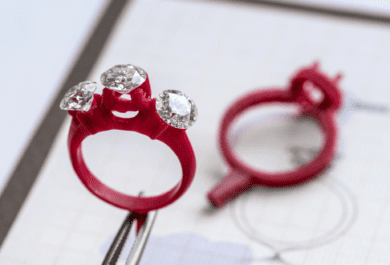
Here are four separate CAD designs that I have put into one photograph for comparison purposes.
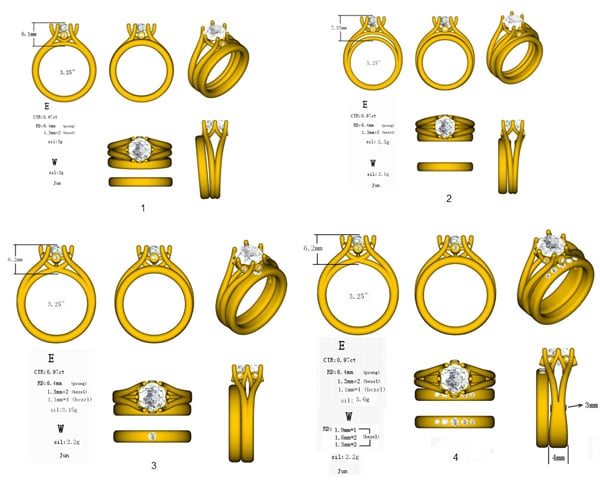
As you can see, there are subtle yet substantive differences between CADs number one and number four. For one, the wedding band now stands straight and the engagement ring has a thicker base with a slight space between part of the wedding and engagement rings and with diamonds now in the wedding band.
Also, please note that although the ring was to be made in platinum, the CAD is shown in yellow as it is difficult to get white to show properly against white paper for purposes of seeing the design. It is interesting to me to observe the difficulty that I had in understanding exactly what my client wanted and once I did in getting my CAD artist to understand exactly what I was trying to tell him. While attempt number two was more in line with what my client wanted than attempt number one, it is nowhere near what we ended up with in CAD number four. Notice the much more graceful lines in CAD number four then in the “almost” correct CAD number three.
Here is the fantastic ring that we soon delivered to our client after the months of back-and-forth on the exact design were finished.
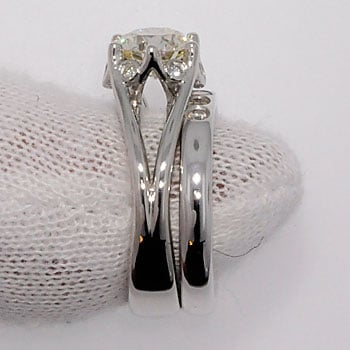
Shown with wedding band

* * *
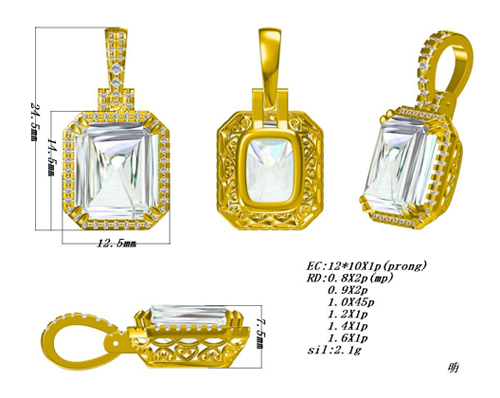
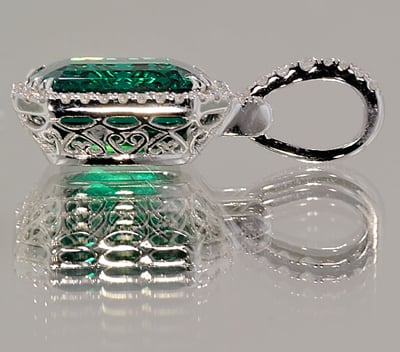
Now, lest you think it is always difficult to create a beautiful piece, sometimes it is incredibly simple. One day we received an e-mail from a lady who said she wanted a ring and pendant with Chatham Created Emeralds. She sent us a photo of the basic design she wanted to use we discussed various options and Melissa sent her the following CAD.
#Wink- client name (09-22-11)
Hi client name,
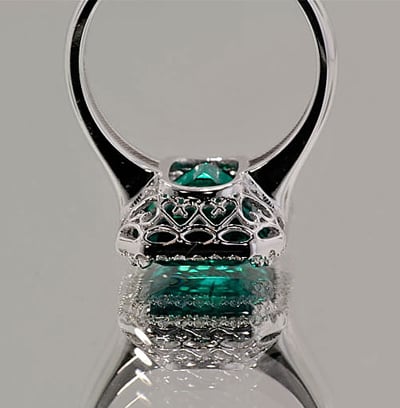
Here is the quote that you have requested in 18K WG. I personally think these pieces are just absolutely exquisite, and could not be any better. Keep in mind that although we’ll be doing them in 18k white gold, the CAD is done in yellow so that you can see where the diamonds will be placed. I think you’ll be very pleased if you move forward with these designs. I’ve provided you with a substantial discount off our normal prices since you’ve been such a great client. As I mentioned before, I wanted to provide you with something absolutely amazing, so I took the liberty of finding the most gorgeous filigree design for the undergallery on both pieces. I hope you are pleased with them.
Please take a look at the cads, and let me know if you would like to proceed to production.
Best regards,
Melissa
CAD #P110915B7 contains (52) 0.8mm-1.6mm BR=0.28cttw + customer’s 12x10mm E.C.
$xxxxx
CAD#R110915B7-1 contains (36)1.0mm BR=0.18cttw + customer’s 11x9mm E.C.
$xxxxx
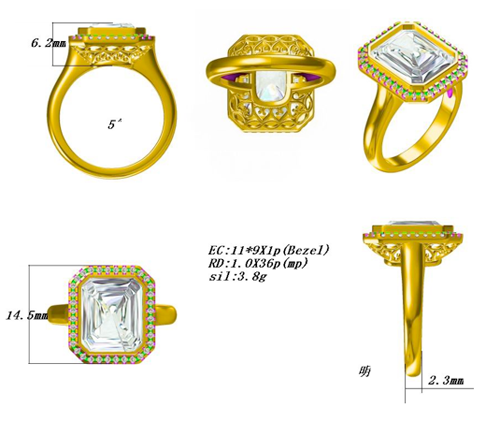
As you can see, the CAD contains all of the information about the stone sizes and weights and when the ring is involved the number inside the ring shank is the actual finger size to which the ring will be made. In this case a size 5.
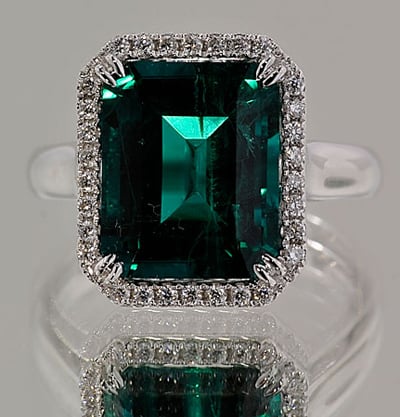
Even though both the pendant and the ring are complex pieces this was the only CAD required to provide the following beautiful pieces of jewelry.

* * *
As you can see from the above examples, the design process can be simple, it can be complex, it can be temporarily frustrating, but normally it is incredibly rewarding when the process is done.
There are some things that you need to be prepared to do for this to be successful.
1. Have some ideas about what you want and be prepared to discuss them with your jeweler.
2. Understand that the creative process may take more than one try before you are satisfied.
3. Be critical when you look at your CAD. If you have any questions, now is the time to express them. At this point what you are looking at is a design concept. If there is something about the design you do not like, talk with your jeweler and have him make a new CAD prior to beginning work.
4. If at any time you feel your jeweler is not responding to your concerns and desires, walk away. Your CAD fee will be small and walking away from someone who is not listening to you is better than ending up with a piece you do not like.
5. Understand that with most CAD programs the ring will not look exactly as it will when it is finished. The prongs will tend to stand up too high as they will be made longer than necessary so that the stone may be set securely and the excess removed after stone setting. Things like pavé will not look finished as the beads that are used to set the stones will not show in the CAD. If you are uncomfortable with this, ask your jeweler to show you an example of a CAD and the finished piece so that you can see the difference. If you go back to the beautiful ring we did with the purple sapphires it will be very easy to see how different the finished piece looked than the CAD did where the sapphires were pavé set.
6. Understand that doing proper custom work takes time. If you want this ring next week go to the mall and buy a finished piece.
7. Enjoy the process!!! You are about to create something that is uniquely you! Enjoy it. If you are creating this for someone you love, or for yourself, know that the end result will give you a story to tell for the rest of your life. What a shame it would be if you did not enjoy creating this magnificent story.
* * *
I hope that this short article has given you some insight into the custom CAD design process.
by Wink Jones
High Performance Diamonds
![]()
Click here to discuss on the Forum

Retail Diamond Prices Chart Updated Monthly.
Choosing an engagement ring is a significant milestone in one’s life journey, and finding the perfect brand can make this experience even more memorable. Some brands stand out among the…

Why should you get your Mom diamond jewelry for Mother’s Day? Diamonds are appreciated for their clarity and brilliance. In much the same way, great mothers offer their children clarity…
If you are looking to pop the question this spring, we have you covered for engagement ring shopping. We’ll add some proposal ideas too to inspire you when you take…
 is an easy tool that analyzes the data of round diamonds and calculates a score that grades cut quality.")