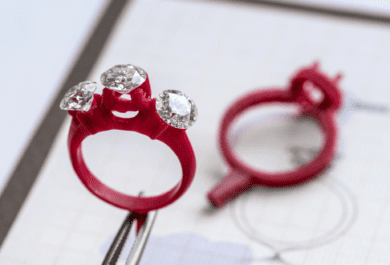
Spring Engagement Rings
If you are looking to pop the question this spring, we have you covered for engagement ring shopping. We’ll add some proposal ideas too to inspire you when you take…
This article is the second in a series on how gemstones are faceted. This gemstone cutting tutorial takes the reader from rough gemstone to a finished 4.59 carat cushion. The original piece of rhodolite garnet rough was 10.2 carats and was shaped well for a cushion cut.
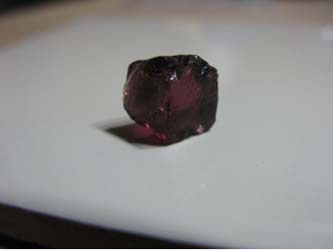
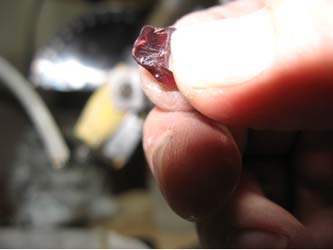
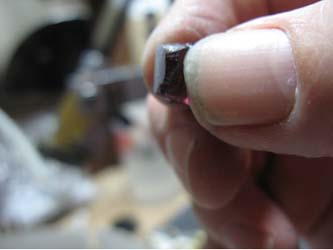
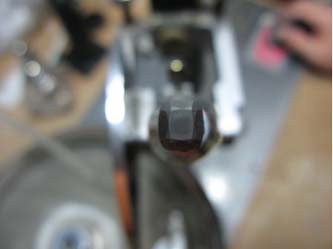
The piece of rough was well shaped but needed to have a section removed due to having an inclusion in the gemstone. The section was also thin on one end. The picture below shows the section that was thin. The inclusion can clearly be seen on the far left side.
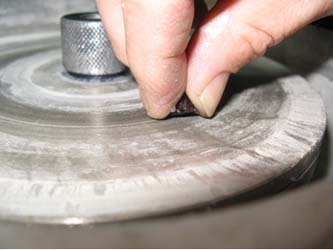
The next photo shows the process of performing the gemstone to remove the inclusions and to form the basic outline of the gem. The lap being used is a 260 grit performing wheel I use for my performing projects. Care must be taken to not get the stone too hot, to avoid this a lot of water is placed on the stone and lap.
The inclusion has been removed and the side has been brought in to an even depth. The other sides are now preformed to the desired shape.
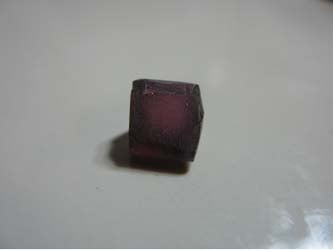
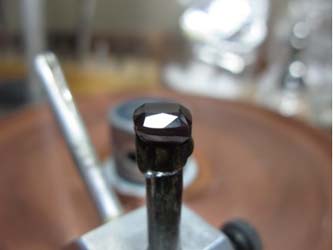
The basic shape is now complete. As you can tell the shape is not perfect, during performing we are not looking to create a perfect shape. We simply try to get the inclusions out and create a better shape to help speed up the cutting process. The weight of the preformed gemstone is 7.29 carats.
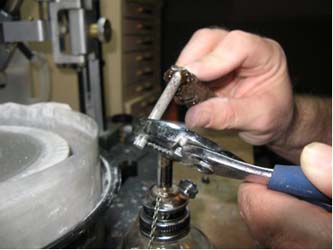
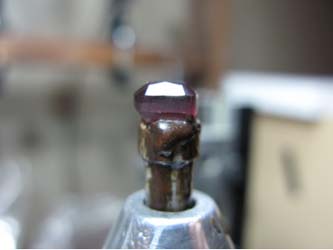
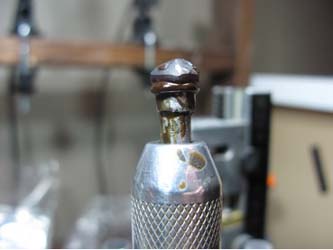
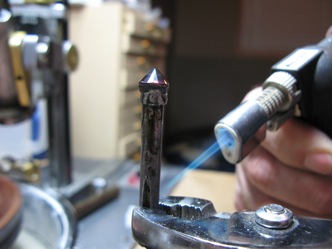
The next step is to heat the stone and dop wax to adhere the stone to a dop stick. The dop stick is then placed in the faceting machine and the cutting process starts.
This stone was the second rhodolite that I was cutting from the parcel I purchased. I must have got excited because I did not capture as many pictures of the process of cutting as the oval cutting project.
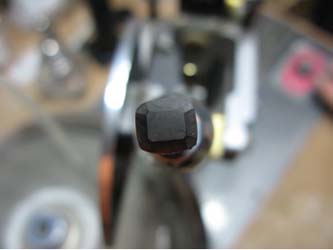
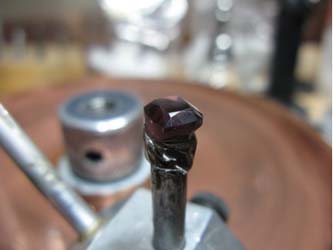
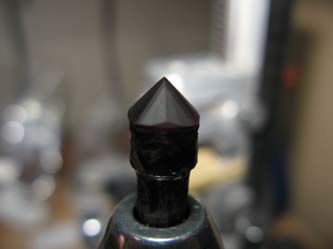
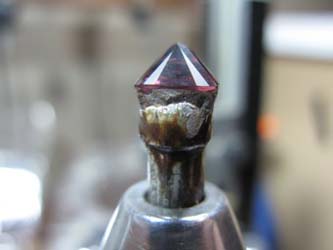
The basic outline was formed on a 600 grit lap then the table was flattened. The eight main crown facets were cut at an angle of 37 degrees which can be seen below.
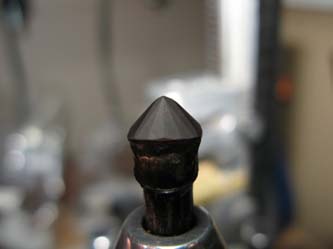
The girdle and star facets are placed on the crown next at angles of 41-43 and 20 degrees respectively. Minor adjustments are made to ensure the facets align properly.
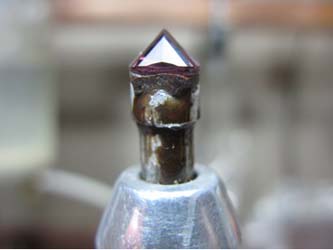
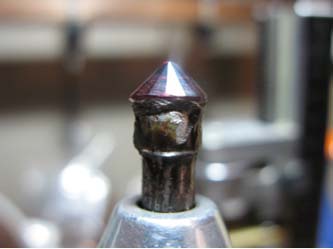
The photo below shows a better view of the cut crown facets. The gemstone is then placed in a 45 degree table dop to polish the gemstones table. I use copper with 100k diamond powder polish all gemstones I cut. A lot of discussion exists for the best prepolish and polish compound combinations. I was taught to cut and polish directly after. To each faceter his own process!

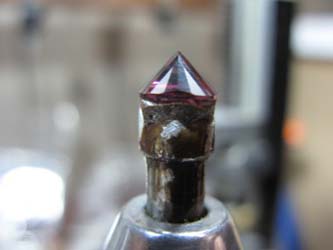
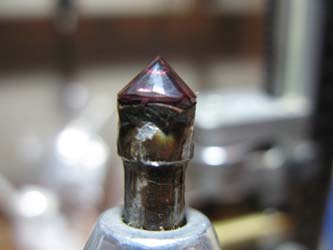
After the table is polished the mains are polished on the gemstone. The girdle facets are polished next, then the stare facets, until the stone has perfect meet-points. The Following pictures show the polished stages of the crown. Notice the polishing on the girdle of the gemstone in the first picture.
After the crown is polished to perfection the garnet is transferred so the pavilion of the gemstone can be cut and polished. The first picture shows the pavilion of the gemstone after transferring.
The pavilion of the gemstone is cut in a brilliant style to help with brilliance and get a good amount of light into the gemstone. Garnets are notoriously dark so they must be cut to not darken the tone of the finished stone.
The next photo was taken and shows some of the great color. At this stage the 8 main pavilion facets are being cut to reduce the girdle size and make it uniform. Notice the great color already showing in the gem!

After the main and girdle facets have been placed it is time to finish up the stone by polishing the girdle. Once again, I am choosing to polish the garnet with 100k diamond polish on copper. Notice the difference between the unpolished facets of the pavilion and the two polished facets in this picture.

The picture below shows a different angle on the polished sections.
The polishing process is the slower part of the gemstone cutting process. Cutting a gem usually does not take very long even for complicated designs. The time it takes to finish a gemstone comes from the polishing process. This is where facet alignment is finalized and perfected. One of the main differences between commercial cut and precision cut gemstones is the quality of the polish.
The final polished pavilion is shown in the next two pictures. The only stage left now is to remove the gemstone with a torch and to soak it in an alcohol bath to remove the dop wax.
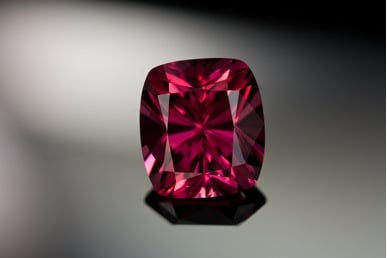
The final piece was 4.59 carats. The color and brilliance were expertly captured by Jeff Hunt of One World Gemstone. The color of the gem made it a very rare rhodolite. The combination or size, color, clarity and expert cutting combined to form a one of a kind gemstone for the client’s collection.
What type of gemstone cut do you want to see next? Please comment below and I will document the cutting process for the next installment of gemstone cutting step by step.
by Jim Rentfrow
Flawless Facets
![]()
Click here to discuss on the Forum

Retail Diamond Prices Chart Updated Monthly.
If you are looking to pop the question this spring, we have you covered for engagement ring shopping. We’ll add some proposal ideas too to inspire you when you take…
We don’t talk about birthstones every single month, but we love any opportunity to talk about our favorite gemstones. Diamonds are among our favorite gemstones. The diamond is the birthstone…
So long, March; hello again, April. We love seeing all the new jewelry pieces posted by PriceScope community members! We are thrilled to see that your collections are growing beautifully,…
 is an easy tool that analyzes the data of round diamonds and calculates a score that grades cut quality.")